• Home
    • Recipes
    • The Roast Chicken Project
    • Allie Dreams of Cake
    • Sunday Suppers
  • Travel
  • About
Menu

Tea and Fog

Street Address
City, State, Zip
Phone Number

Your Custom Text Here

Tea and Fog

  • Home
  • Recipes
    • Recipes
    • The Roast Chicken Project
    • Allie Dreams of Cake
    • Sunday Suppers
  • Travel
  • About

Not-from-the-box Asian Veggie Burgers

April 7, 2015 Allie

My secret shame when I go to barbecues is that even among all the gloriously charred burgers and  delicious sausages, I almost always end up craving a veggie burger.  And not just any veggie burger, but those super-processed frozen hockey pucks in a green box (it doesn't matter what brand, it's always a green box). Maybe it's because I'm hungry and I know I won't have to wait very long for it to cook, or maybe it's because I instinctively know it's the only food that won't make me feel like a swelled balloon when I combine it with all that beer over there in the cooler. I'm not sure why it happens, but it does.

As it turns out, I'm not the only one who gets cravings for these things. One day I was chatting with my friend Rob and he mentioned that his new favorite lunch was heating up frozen veggie burger patties in the microwave.  This surprised me, because if Rob walked into a barbecue filled with the smell of meat smoke, he would definitely not be deciding on the veggie patties. But apparently he had grown fond of a certain brand's Asian Veggie Patties. Now, I'm all for my friends eating whatever they want, and obviously I've admitted to eating these boxed things in the past, but I suddenly really wanted to figure out my own, less-processed recipe for these veggie burgers. And once I went online and read the ingredient list, that want became more of an immediate need.

About that ingredient list. It is loooooong, as in 38 separate ingredients. Even once I removed everything that I was sure were thickeners, stabilizers, and preservatives, I was still left with a pretty lengthy list of vegetables. Even so, I decided to use that list as my starting point, because in my experience with veggie burgers, the more veggies you pack in, the more flavor and moisture you end up with in the final product. And that is a good thing if you are trying to avoid dry, crumbly, tasteless patties. 

Once I had a list of ingredients to start from, I went to work refining it. Chickpeas would be good for the base since they don't have a super strong flavor and other ingredients could shine through. Onions? Yes, but I would caramelize them for sweetness. Carrots, a must, since they add great moisture to the burgers. Ditto celery. Also ditto the bamboo shoots and water chestnuts, which I couldn't see adding much in the way of flavor but they couldn't hurt. For a punch of flavor, scallions, ginger, and garlic. Also soy sauce, sesame oil, and a splash of rice vinegar to brighten everything up. And to bind, panko crumbs and an egg. At this point, I had pretty much decided to incorporate all of the veggie ingredients from the original recipe. I was intrigued that the original ingredient list also called for dehydrated pineapple juice. I certainly didn't have any of that on hand, but I did have some dried pineapple in my pantry so I decided to throw a few slices of that in too. 
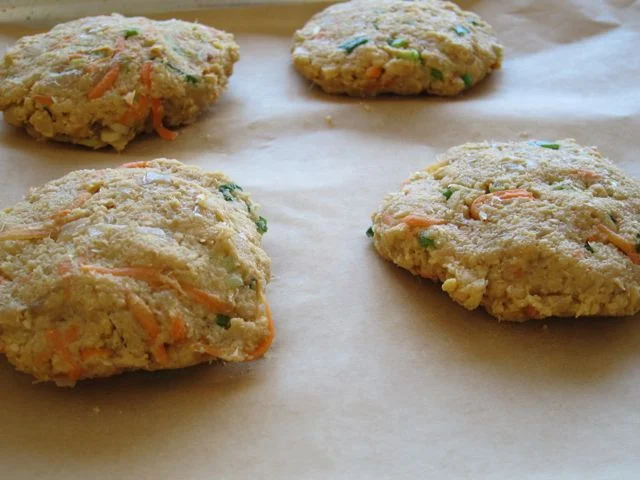
I'm not sure you can really call my final result or their inspiration "Asian" apart from some of the ingredients are used frequently in Asian cooking. Whatever you want to call them, they are gingery, moist yet not mushy, and most importantly, tasty enough to banish any cravings for the processed alternative. Also a bonus? You can get twice as many to stock your freezer with. Pick out your favorite toppings or use my suggestions below and pile it all on a bun, or sans bun on a plate as I did. Either way, these are better than any store-bought patty could ever be.
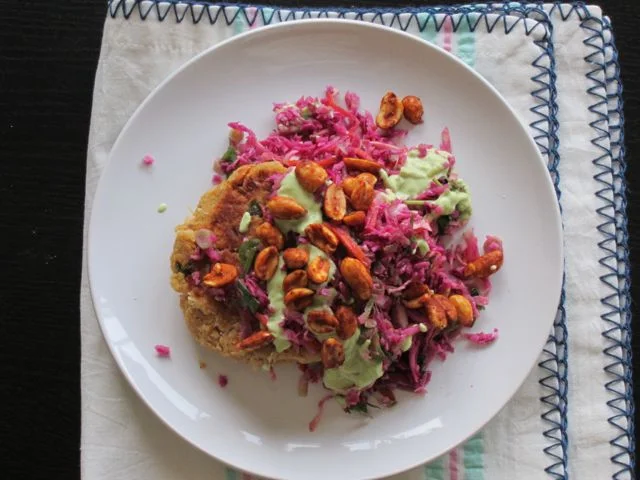

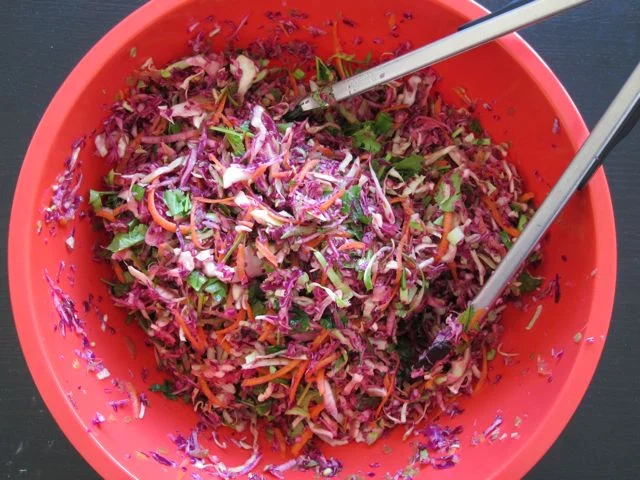
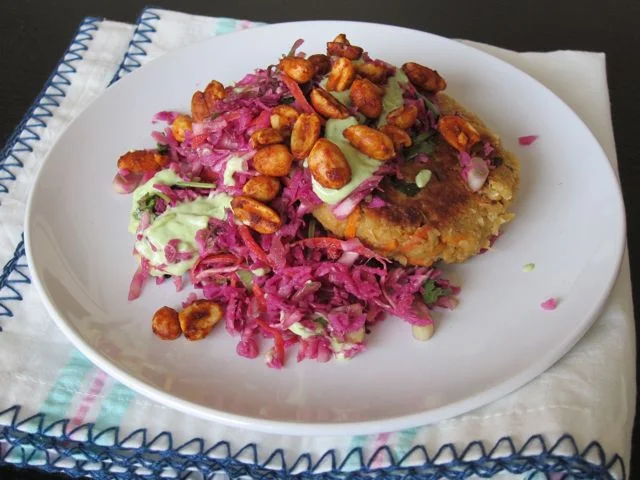
Asian Veggie Burgers with Red Cabbage Slaw, Avocado-Lime Mayo and Sriracha Roasted Peanuts

Β 

Yields 6-8 burgers, depending on how large you shape the patties.

For the burgers:

3 slices dried pineapple (optional)
2 tbsp olive oil
1 onion, diced small
1 carrot, peeled
1/2 bunch green onions (about 4 or 5)
1 stalk celery, cut into chunks
Β½ can water chestnuts
Β½ can bamboo shoots
2 cloves garlic, peeled
Β½ inch piece ginger, peeled
1 tbsp soy sauce
2 tsp sesame seed oil
1 tsp rice vinegar
1 can chickpeas
1 cup panko bread crumbs (or more, if needed)
1 egg

For the Slaw:

1/2 head Red Cabbage, sliced into wedges 
1/2 head Green cabbage, sliced into wedges
1 Carrot
1 1/2 cup Snow Peas
3 green onions, sliced thinly
a good handfull cilantro, chopped
1/4 cup rice vinegar
juice of 1 lime
1 tbs sesame oil
1 tbs olive oil
1 tsp kosher salt

For the Avocado Lime Mayo:

1/8 cup mayonnaise
1 avocado
zest of 1 lime
juice of 1 lime 

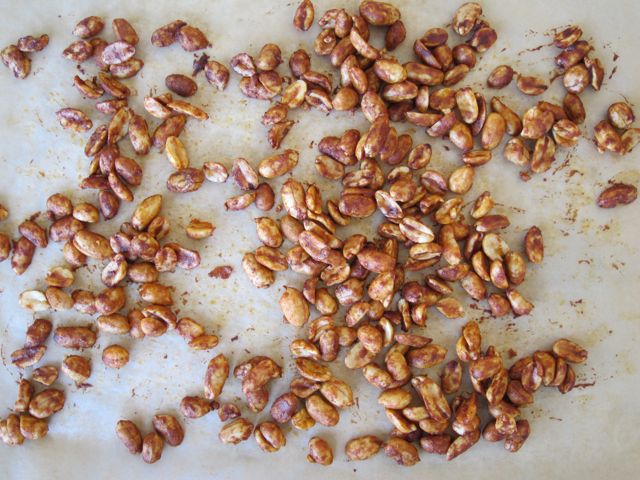
For the Peanuts:

1 cup salted peanuts
1 tsp neutral oil like grapeseed or canola
1 tsp honey
1 tbsp sriracha

To make the burgers:

  1. If using, rehydrate dried pineapple: pour boiling water over slices and let them sit for at least 20 minutes or until ready to use.
  2. In a skillet, heat 2 tbsp olive oil over medium head and add the onions, cooking for about 20-30 minutes until caramelized.
  3. While onions are cooking, shred carrot and dice the scallions, then transfer to a large mixing bowl.
  4. In a food processor, add celery, water chestnuts, bamboo shoots, garlic, and ginger and pulse until fine.
  5. Add the caramelized onions and pulse a few times, then add vegetable mixture back into the skillet and saute for about a minute until fragrant and some of the liquid has evaporated. Add soy sauce, rice vinegar and sesame oil to the pan and stir to combine. 
  6. Add vegetable mixture to the mixing bowl with your carrot and scallions and let cool. In the meantime, add chickpeas and rehydrated pineapple (if using) to the food processor and pulse until chunky but not pureed. Add chickpeas and pineapple to the mixing bowl.
  7. Once mixture has cooled a bit, add breadcrumbs and egg to the bowl and stir until everything is combined.
  8. Let mixture rest in the refrigerator if possible. Patties will be easier to form when mixture is cold.

While the burger mixture is chilling, make your slaw and roast your peanuts:

Make the slaw:

  1. In a large mixing bowl, whisk together rice vinegar, lime juice, sesame oil, and salt.
  2. Wipe out your food processor and fit it with the shredding attachment.  In batches as necessary, shred green cabbage, then carrots and snow peas, then red cabbage. 
  3. Combine shredded vegetables in the mixing bowl with your green onions and cilantro and toss together to combine.

Roast the peanuts:

  1. Preheat oven to 350 degrees and line a baking sheet with parchment. In a small bowl, whisk together oil, honey and sriracha and toss with the peanuts. Spread peanuts in an even layer on baking sheet and bake 10-15 minutes, until fragrant and toasted. Let cool. 

Make the mayo:

  1. In a small bowl, mash together the avocado, mayonnaise, lime juice and lime zest until combined and smooth.

To cook burgers:

  1. With wet hands, form into patties (make sure they are the size you want when they are done, since they will not shrink down like meat burgers).
  2. To pan fry, add a thin layer of oil to the bottom of a non-stick skillet on medium heat. When hot, add the patties and cook about 5 minutes on each side, until firm and nicely browned. To bake, preheat oven to 425. Grease a baking sheet and line with parchment paper, then bake for 15 minutes on each side. Baked burgers will be a little drier inside. You can also broil for 5 minutes per side under the broiler.
  3. To serve, pile as much slaw as you want on top of a patty, drizzle with avocado mayo and sprinkle with peanuts. 

Note: 

  • To make these vegan, omit the egg in the burger patties, swap agave for honey in the peanuts, and use vegan mayo.
Β 

Β 

In Recipes Tags Main Dish, Vegetarian
Comment

Warm Nicoise Salad

March 31, 2015 Allie

I have a few friends who would vehemently disagree with me, but I don't generally consider myself a picky eater. I will try anything once, so I know the foods I don't like have all been tasted by me, most likely more than once, and I just really don't like them. Beets? Hate. Olives? No thank you. Fennel? Why? In the case of raw or undercooked foods, it's usually more of an instinctive rejection I can't get past, as if my body is programmed a certain way and I can't override it. For example, I'll decide to get over it already and take a bite of that dish with the runny egg, or steak tartare or raw fish, and the signals between my brain and my esophagus go as follows (run-on sentences only obviously, as this dialogue happens so rapidly there's no way my neural pathways could be pausing for good grammar):  

Brain: Oh look how pretty that looks amazing let me have a bite ooh it tastes good oh this isn't cooked hey look at me being all adventurous I mean I know its not cooked but still pretty and it's yummy right so it's fine look I'm eating it--

Body: ALERT UNCOOKED FOOD ALERT MUST NOT DIGEST WILL NOT ACCEPT MUST NOT ACCEPT--

Brain: No no it's ok its ok see it tastes fine delicious even you can do it you can do it don't worry about it--

Body: UNCOOKED FOOD CANNOT COMPUTE MUST EJECT--

Uh, yeah, so that's when the gagging starts.

The really irritating thing about all of this is that my list of foods I truly dislike isn't even that long! There are maybe five things I really never ever want to eat again, but they just so happen to be extremely popular on menus, especially in the winter months, when a delicious bounty of other root vegetables still somehow takes a backseat to those trendy all-stars, fennel and beets. Loathe and double loathe.  As for the rest of the year, it's always a constant battle against the ubiquity of olives, sushi, and raw beef, inevitably served with a raw or poached egg on top. Yum,  just what I wanted never. 

Salad nicoise is a dish that perfectly encapsulates my conundrum. It's not something that I see very frequently on  menus, but if I did, it would be one of those dishes that I reluctantly don't order, because even though it sounds delicious, and even though I could easily skip the olives, most restaurants almost always fancy it up with barely seared (i.e. raw) tuna instead of the canned variety, and hardly anything looks less appetizing to me than those thin steaks with the purple center outlined by a bare millimeter of cooked flesh. 

Nicoise Salad Ingredients.jpg
Nicoise Salad.jpg

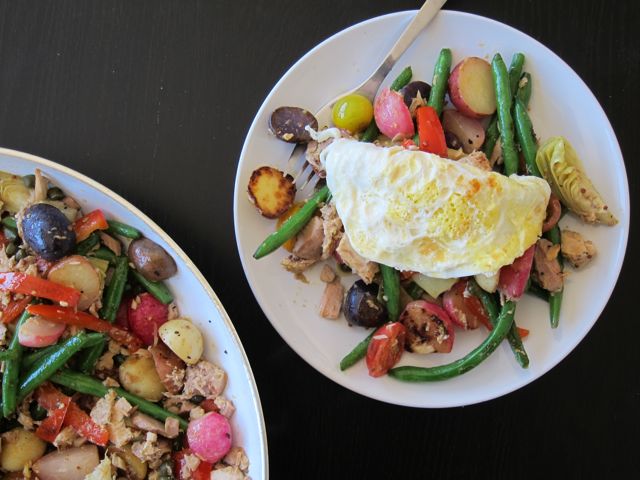
But this version, I tweaked it to suit me. All tuna is fresh out of the can and blessedly cooked, olives have been swapped with capers, and there is not an anchovy in sight. Searching online and perusing my single cookbook on French cuisine* yielded many recipe variations for this salad, with tomatoes, eggs, green beans, and potatoes being the mainstays. So I kept those, and also added red bell peppers, artichoke hearts, and radishes. Also? I cooked it! Every vegetable. The result was a warm, definitely not-composed salad of tuna and vegetables hinting at warmer weather but still appropriate for the last cool days of winter temps.  It's an Easter basket of vegetables, a riot of color perfect for a spring table.

*Julia Child also explicitly calls for canned tuna in her Nicoise Salad, so I'm in good company!

Despite my personal feelings, I'm going to encourage you to top this beauty with a poached egg, if that's your thing. I bet it would be amazing. If it's not your thing, well, I topped mine with a crispy fried egg and promptly inhaled it.


Warm Nicoise Salad

For the salad:

1 cup baby potatoes, any variety (yukon gold, fingerling, etc. I used marble potatoes)
2 cups green beans
2 Tbs olive oil
3/4 cup red radishes, sliced into quarters
1 bell pepper, red, yellow or orange, cut into strips
1 cup cherry tomatoes, sliced in half
1/2 can quartered artichoke hearts, drained
1-2 cans oil-packed tuna, drained (see note)
2 Tbs capers

For the vinaigrette:

2 Tbs freshly squeezed lemon juice
1/2 tsp dijon mustard
4 Tbs olive oil
salt and pepper, to taste

  1. Whisk together vinaigrette ingredients and set aside.
  2. Parboil your potatoes: bring a large pot of generously salted water to a boil, and boil potatoes until you can just pierce the largest ones with a fork. While potatoes are boiling, you can also blanch your green beans in the same pot. Drop the green beans in the water and boil for 1 minute, then remove with tongs and plunge immediately into an ice bath. Submerge the green beans in the ice bath until they are the same temperature as the water.When potatoes are done, drain and let cool, then slice in half. 
  3. Heat olive oil in a skillet over medium high heat, then add bell pepper and radishes and a pinch of salt. Saute for 1-2 minutes until peppers begin to soften, then add potatoes and green beans. Saute until potatoes turn golden, about 3-5 minutes. Add artichoke, tomatoes and tuna to the pan and saute 1-2 minutes more, until everything is warmed through and tomatoes start to release their juice.
  4. Remove the pan from the heat and toss the vegetables and tuna with the vinaigrette and capers. Taste and adjust for salt and pepper.
  5. To serve, pile salad on a plate and top with a poached or fried egg.

Note:

  • I used two cans of tuna, which made this salad more of a vegetable-heavy variation on tuna salad. If you want the tuna as more of a background ingredient, use 1 can. Also, I would recommend using tuna packed in oil, but if you don't have that, water-packed tuna is fine. Before adding the tuna to your salad, break it up with a fork with a little olive oil and more mustard, if desired.
  • All vegetable amounts are of course variable, and can be swapped in an out as desired.

Β 

Β 

Β 

Β 

In Recipes Tags Main Dish
2 Comments

Rosemary Blackberry Poptarts with Brown Sugar Icing

March 27, 2015 Allie

I planned to spend last Saturday afternoon baking pop tarts and then eating them while catching up on The Good Wife. But, when my friend Susan invited me over to bake them at her house, I couldn’t say no. My kitchen at home is pretty functional, but two people barely fit in it, so cooking at my apartment is almost never a social activity. The prospect of a huge (to me) open kitchen with an actual table in it, plenty of counter space, and a gas oven was too tempting to turn down. Plus, I can’t think of many better ways to spend my weekend than sitting around with friends, drinking wine and cooking tasty treats with an eager audience waiting to try them.

Having a group of taste testers ready to try these right out of the oven turned out to be fortunate, since I got a little experimental with my icing. You know that hard, sugary crust that seems to have been shellacked on top of store-bought pop tarts? For some reason, I got a little fixated on replicating that. An obvious way seemed to be royal icing, but there were two problems with this. I don’t love the aftertaste of the egg white in royal icing, and I also I really wanted to use brown sugar.  A quick internet search solved the egg white problem by subbing corn syrup, but I’ve yet to find powdered brown sugar anywhere. So….I made it, and I wound up with a beautiful, light brown powder that in my mind was sure to work.

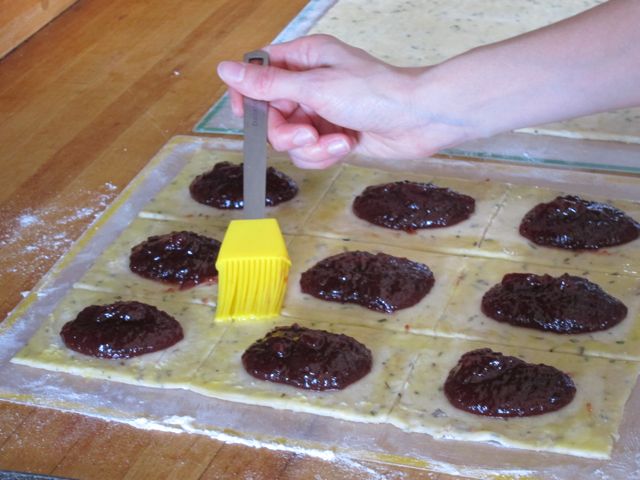
Unbaked Pop Tarts.jpg

I already told you that I freaking made my own powdered brown sugar, so maybe when I use the phrase β€œin my mind” that should be a clue that I was in fact not heading in the right direction with this, but instead nearing the borders of crazy town. I had deluded myself into thinking I could magically turn one ingredient into another, but of course my powdered brown sugar was never going to blend with the corn syrup into a paste the way regular powdered sugar would. This should have been obvious to me but I was still a little surprised when I wound up with a grainy, deep amber colored mixture that was nothing like what I had been picturing. Was it delicious? Oh yes. I mean the two main ingredients were sugar and more sugar, so how could it not be? But it was clearly so far off of what I had been imagining, and it was so ridiculously sweet* that I was hesitant to actually put it on the pop tarts.  I decided to go with it anyway and see what happened.

*This did not stop Susan’s boyfriend Mike from eating it by the spoonful before we stopped him. He may still get "the diabeetus".

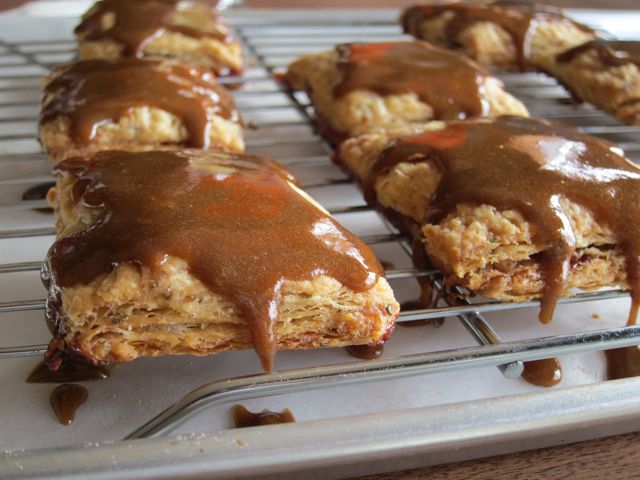
 I spooned the glaze over my tarts and let them sit for about an hour until it hardened. Then we tried them. The pastry was flaky, the rosemary was a subtle background note to the jam filling, and the brown sugar? Well, it was definitely that extra punch of flavor I was looking for, plus a roundhouse kick to the teeth. It was good, and even better after a few more hours, but still not really necessary to the tarts.

 By the way, I’m still not caught up on the Good Wife. So, if Alicia won her election and then immediately ran off to celebrate on a desert island with Finn, I’m gonna be really happy about that but no spoilers please.


Rosemary Blackberry Pop Tarts with Brown Sugar Icing

Tart dough and filling adapted from King Arthur Flour.  I added rosemary to the dough, and would highly recommend not following their instructions for assembly. I did, but it was problematic, and there is a much easier way that I outlined below.

Rosemary Tart Dough

2 cups (8 Β½ oz) all purpose flour
1 tbs sugar
1 tsp salt
2 sticks (8 oz) cold, unsalted butter, cubed
1 large egg
2 tbs milk
1-2 tbs chopped fresh rosemary, depending on how much you like

Blackberry Filling

ΒΎ cup blackberry jam 
1 tbs cornstarch or other thickening agent, mixed with 1 tbs cold water (I used tapioca flour)
1 large egg

Brown Sugar Icing

6 oz Powdered Sugar or Powdered Brown sugar (see note)
1 oz corn syrup
1 tsp vanilla bean paste
1/4 tsp salt

  1. Make tart dough: whisk together the flour, sugar, and salt. With a pastry blender, two forks, or your fingers, mix in the butter until the mixture forms large pea-sized lumps that easily hold together when you squeeze it. Beat the egg and the milk together and add to the dough, mixing just until everything holds together.  Divide the dough into two, and shape the halves into rectangles.  Wrap in plastic and refrigerate for 15 minutes or up to 2 days. Dough can also be made ahead of time and stored wrapped in plastic in the freezer until needed.
  2. Make jam filling: mix the jam and cornstarch mixture in a small saucepan and bring to a boil. Simmer for 2 minutes, then remove from heat and let cool completely.
  3. Make tarts: let chilled dough warm up until softened and workable, then roll out one half of the tart dough on a lightly floured surface into a rough 10”X13” rectangle, about 1/8” thick.  Using a 9"x13" baking pan or a ruler as a guide, cut out a 9"x12" rectangle.  Set dough scraps and the rectangle aside for later. 
  4. Repeat step 3 with second half of the dough. After rolling, use a ruler and cut three lines in the dough lengthwise and widthwise so you end up with nine 3”x4” dough rectangles. Transfer the rectangles to a parchment lined baking sheet.
  5. Whisk your egg and brush it lightly over the entire dough surface. This will act as the glue to hold your tarts together. Drop 1 heaping tablespoon of filling onto the center of each scored rectangle. Cut your first large 9"x12" rectangle into 3"x4" rectangles, and lay these over the filled squares. Press firmly around the filling in each square, sealing it in. Press the edges of each rectangle with your fingers to seal, then seal again with a fork.
  6. Prick the top of each tart with a fork multiple times, so steam can escape while baking. Refrigerate tarts for 30 minutes.
  7. While tarts are chilling, preheat oven to 350 degrees.  Once tarts have chilled for 30 minutes, bake them for 25-35 minutes, until golden brown.  Remove from the oven and let cool completely.
  8. Ice tarts: mix together icing ingredients until incorporated. Spoon over each tart and let set.

Note:

  • I made brown powdered sugar by this method. Crazy? Maybe, but also not really worth the extra effort. I just really wanted that brown sugar taste, and honestly I maybe got too much of it. You can use regular powdered sugar instead. Or, use your favorite brown sugar icing instead. Or, skip the frosting entirely and save on dental bills.

Β 

In Recipes Tags Dessert
Comment
← Newer Posts Older Posts →

For those who plan their next meal while eating the last.

No results found

Β 

INSTAGRAM

🎢When pizza’s on a bagel*, you can have pizza anytime**!🎢

*donut
** after you fry some donuts
FINALLY perfected these Burnt Honey Butter Biscuits & what good timing! It’s carb season & we are all hibernating! 🐻
Final thoughts on Small Thanksgiving: take your sweet potato + marshmallow combo firmly into dessert or even breakfast, and consider a cozy mashed potato soup with stuffing croutons to use up those leftovers. Stay safe & Happy Thanksgiving! πŸ˜·πŸ¦ƒ
Part 2 of Small Thanksgiving: all the stuff to stuff yourself with! An Italian sausage pasta-inspired stuffing and a vegetarian, spiced wild rice stuffed squash. Everything serves 4-6, gather safely this year! πŸ˜·πŸ¦ƒ #thanksgiving #smallthanksgiving #v
Now that we (and the world?) can let out that collective sigh of relief, I can  finally think about my favorite holiday! Everyone is probably (hopefully 😷)looking at smaller gatherings this year, so I’m sending some Small Thanksgiving ideas ou
So happy Disney keeps justifying my dumb baking purchases! This matcha shortbread is delicious, but make a good sandwich cookie it does not. I hid all the broken pieces πŸ™ˆ
Subscribe to Tea and Fog!

RECENT RECIPES

Featured
polenta with rosemary and goat cheese.jpeg
Luxe Rosemary Grits with Goat Cheese
Read more →
Salmon Wellington and Warm Rice Salad.jpeg
Sunday Supper: Salmon Wellington with Warm Rice Salad
Read more →
Pizza Donut Hero.jpeg
Pizza Donuts
Read more →
Burnt Honey Butter Biscuits.jpeg
Burnt Honey Butter Biscuits
Read more →
Mashed Potato Soup with Stuffing croutons.jpeg
Thanksgiving Leftovers Mashed Potato Soup with Stuffing Croutons
Read more →
sweet potato donuts with marshmallow frosting.jpeg
Small Thanksgiving: Sweet Potato Donuts with Toasted Vanilla Marshmallow Topping
Read more →
Summary Block
This block is invalid. Please check the block settings and try again.
Featured
Aenean eu leo Quam
Aenean eu leo Quam

Quisque iaculis facilisis lacinia. Mauris euismod pellentesque tellus sit amet mollis.

Read more →