Luke's Burger

Are you ready for the great feast next week?

Luke's Burger

No, I don't mean Thanksgiving, although yes, I'm excited about that too. This year, however, I'm thinking of it more as training for the real feat, the all out sugar binge, carb fest, junk food bonanza that is the only proper way I can think to celebrate the pop culture holiday of the premier of Gilmore Girls: A Year in the Life.

Are you excited? I definitely am! For many years, Gilmore Girls was right up there among my favorite shows on TV. In high school, my sister and I would watch it on Tuesday nights with our mom, then rehash the episodes the next day with friends in study hall. Then, in college, friends and I would get together and watch, getting so into it that we baked a pretty ugly cake in the dorm kitchen in honor of the 100th episode, and it's entirely possible that I bombed my Greek and Roman Myth midterm Freshman year because I blew off the review session in favor of finding out the fate of Luke and Lorelai*. By the time the show ended, it was definitely waning in quality, but I was still sad to see it go, and when it showed up on Netflix a couple years ago, I was ready to rewatch all of it.

And now, after almost 10 years, we get to find out the answer to so many great mysteries:

Did Luke and Lorelai ever get married? Who does Rory end up with? Did Emily ever find a permanent maid? Does Lane ever leave Stars Hollow?

And, of course, What are the final four words? 

We're gonna find out next Friday! And I cannot wait! It's one of those mysteries I thought I was ok not knowing the answer to until I found out that I would be getting the answer, and now I'm counting down the days. And I know I'm not alone, based on all the listicles out there, so to help us prepare, I've got a special feast menu this week for the sustenance you need to binge all four episodes of Gilmore Girls: A Year in the Life. 

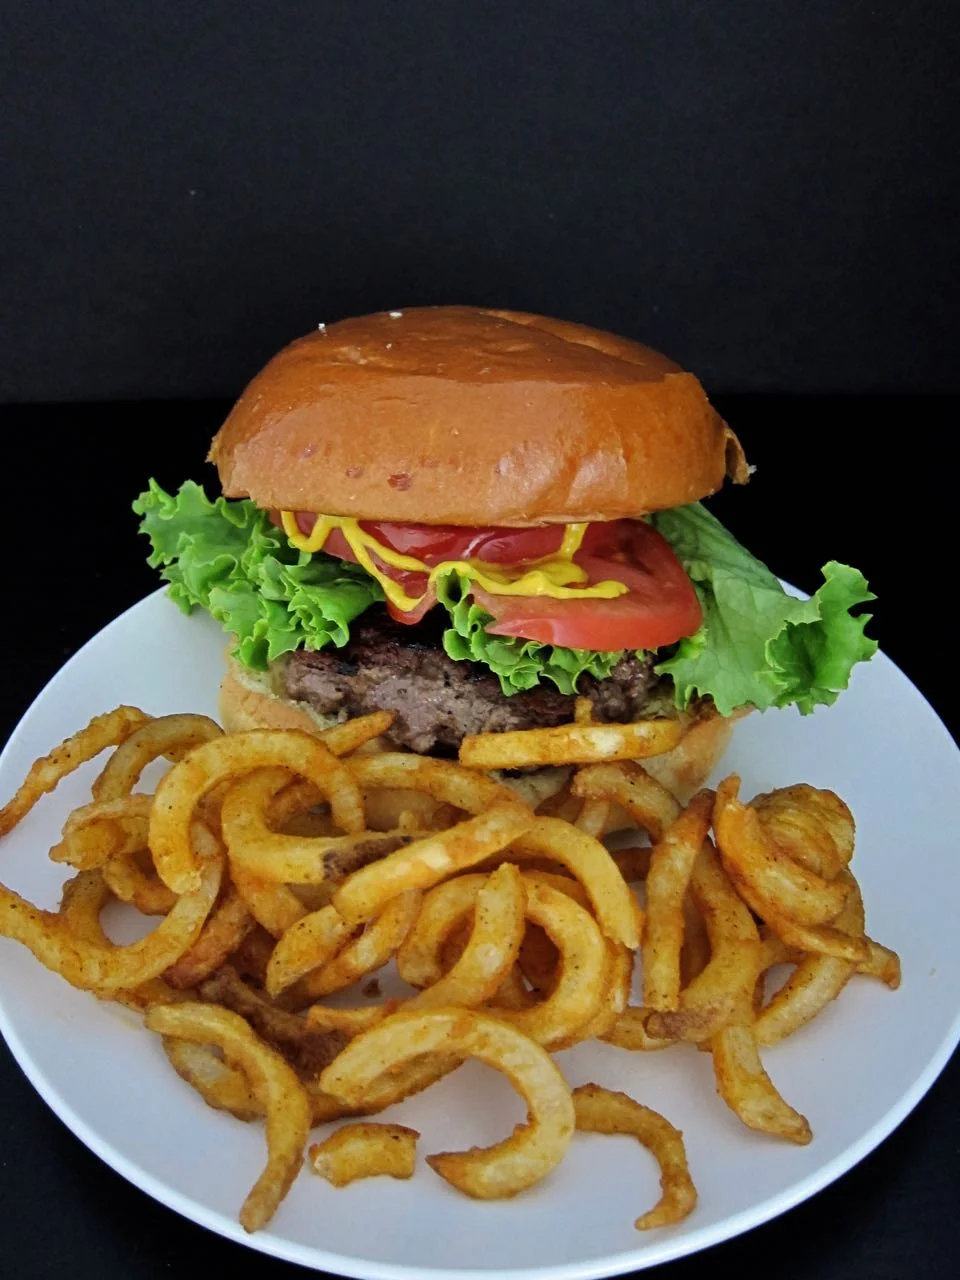
It's starting with that mainstay in the Gilmore diet, perhaps the most important element of the Gilmore food pyramid apart from coffee, Luke's burger. Lorelai and Rory seemed to eat this burger for lunch or dinner at least 5 times a week, sometimes with pinkies up, sometimes on the go, and once, horrifically, covered in cream cheese and olives for the infamous "Santa Burger."

My version, thankfully, is cream cheese free, but it's as close an approximation to Luke's burger as I think you could get, with a patty cooked on a hot cast iron skillet until crispy and charred and topped with only the classics of lettuce, tomato, and the traditional condiments of mustard and ketchup, and maybe some mayo if you're feeling whimsical. Cheese is of course never a bad idea, nor is a side of crispy fries with ketchup and some salt and pepper dip. 

Luke's Diner Burger

*Actually, the entire class bombed that midterm, and, if his lecture anecdotes were any indication, I'm pretty sure it's because our professor was heavy into shrooms. 


Luke's Diner Burger

Adapted from Sam Sifton

  • 1/2 tsp oil or butter, plus more for toasting buns
  • 1 lb lean ground beef (80%)
  • salt & pepper, to taste
  • dash of garlic powder
  • dash of onion powder
  • 4 hamburger buns
  • lettuce, for garnish
  • tomato, sliced, for garnish
  • ketchup, mustard, mayo, for serving
  1. Heat a bit of butter in a cast iron skillet over medium heat. Split and lightly toast the buns, then set aside. Melt oil or butter in the cast iron skillet.
  2. Divide the beef into 4 small, 4 oz piles and gently form into spheres about 2 inches high. Don't smash into patties. In a small bowl, mix together salt, pepper, onion powder, and garlic powder.
  3. Heat the skillet to high, then place the beef spheres into the skillet with plenty of room between them. Using a sturdy metal spatula, smash the beef spheres down to form a patty about 4 inches across and 1/2 inch thick. Season with spice mix to taste.
  4. Cook patties about 2 minutes, until brown and crispy, then turn over and cook another 2-3 minutes. Top with cheese if you wanna. Remove from skillet, place on buns and top as desired with lettuce, tomato, and condiments. Serve with your favorite fries and salt and pepper dip.

"I Voted!" Cookies

I'm voting! Are you?

Today is the day. 

I Voted Cookies

It’s terrifying, exciting, and could be historical for any number of reasons (it’s probably not going to be my most productive day at work).

But here is the most important thing about today:

You get to vote in a free election (that, despite claims to the contrary, is most definitely not rigged)! Anyone over the age of 18 who is registered to vote is allowed to express their choice for who will lead this country. Not everyone in the world gets to say that. We do, and that’s pretty cool. So do it. GO VOTE. 

I Voted Sticker

And just because I don't think you can over-inform on this, here are some helpful links in case you need them:

Where’s your polling place?

Can you vote today if you aren’t registered? 

(You can in 13 States)

What do I do with my kid?

Call your local YMCA! Some locations are offering child care today.

How do I get there?

You have some options!

Β 

Yes, I know it’s voluntary. 43% of eligible Americans know that too. But you know what? You should still do it. WHY? 

Well, I’m not going to get too partisan here but here are a few important issues on the table, whether you go vote blue or red today. 

  • Because we need a full bench on the Supreme Court. 
  • We need Congressmen who want to govern. 
  • We have infrastructure in dire need of repairs. 
  • We need to plan for climate change and all the weird weather to come. 
  • We need to educate our kids. 
  • You get a cookie*.  

We need to stop talking about what’s wrong and try to fix it. How do you do that? YOU VOTE.

I Voted Sticker Cookies

*Offer only valid if you work with me**. 

**Also I only made 10. 


"I Voted!" Cookies

This recipe makes about 40 cookies if you bake off all of the cookies. I made 10 because I am lazy and also not great at decorating cookies (see evidence above).

  • 2 sticks butter, unsalted, softened
  • 1 cup sugar
  • 1 egg
  • 1 tsp vanilla
  • 1/2 tsp salt
  • 2 cups flour
  • 1 tsp baking powder
  • 1 egg white
  • juice 1/2 lemon
  • 1 tsp vanilla
  • 2 cups powdered sugar
  • water, to thin
  • red food coloring (way more than you probably should eat)

Special Equipment:

  • 2-inch round cutter
  • paintbrush
  • "I voted" Sticker & exacto knife (or tiny letter stencils)
  1. In a bowl, combine flour, salt, and baking powder and set aside. With a mixer, cream together sugar and butter until fluffy. Add the egg and vanilla and mix until combined, then add the flour mixture and mix until dough is smooth and fully combined. 
  2. Turn dough out onto a surface and form into a round. Wrap in plastic wrap and chill, at least 1 hour.
  3. When ready to bake, preheat oven to 350 degrees. Roll dough out on a floured surface and cut into circles with a 2-inch round cutter. Transfer rounds to a parchment lined baking sheet and bake for 13-15 minutes, rotating halfway through, until just golden around the edges. Let cool completely on a wire rack.
  4. When ready to ice cookies, combine all remaining ingredients except the water and food coloring in the bowl of a mixer fitted with a whist attachment, and beat until a smooth, fairly stiff icing forms. Remove about 1/4 of the icing and set aside in the fridge, covered well (you'll want to use plastic wrap and press it into the surface of the icing). 
  5. Add red food coloring to the remaining icing, enough to turn the mixture a bright, patriotic red. This will likely take more food coloring than you want to know about. 
  6. Transfer some of the icing to a piping bag fitted with a small, round tip, and pipe a red circle around the border of each cookie. Then, add a bit of water to the rest of the red icing, enough to thin it out so that you can "flood" the piped circle with icing. You don't want it to be so thin that it won't dry, but it will be easier to ice all of these cookies if the icing can puddle and spread.
  7. Flood your circles, gently tapping cookies on a flat surface to pop any bubbles that appear, or popping them with a toothpick. Then let sit to dry, uncovered, overnight.
  8. When ready to finish icing, get the rest of your white icing that you have kept tightly covered all night in the fridge. Thin it out with some water a bit, and using a piping bag with the same tip from yesterday, pipe white circles around the outside of the cookies, set in a bit from the edge. 
  9. Then, thin the icing some more until you can paint with it. If you are sane, use letter stencils to paint the words "I Voted!" onto the center of each cookie. If you are not, use the exacto knife to carefully cut the letters out of your old voting sticker, and attempt to use it as a stencil. Let icing dry completely then enjoy!

Notes:

  • You could use an old voting sticker like I did, or tiny letter stencils, or you could print out a template on stiff card stock and use that as a stencil. This would all probably be easier with 3-inch cookies.

Cuban Black Beans

(Claire's back today! She's doing me a solid during my post-Sydney/pre-Jersey jet lag transition and popping in to tell you about her black beans! I hear they are Cuban, maybe, but I think the part to focus on is the "easy weeknight dinner" part, because we can all use more meals like that!)


Cuban Black Beans

First thing’s first. Allie asked me what makes these β€œCuban,” and the answer is I don’t really know. Stewed beans over rice is hardly unique to any one culture, and the addition of bell pepper and onion reminds me of sofrito (Puerto Rican) more than anything else. But don’t worry about this and call it whatever you like! We’re talking about slowly stewed black beans, full of flavor, served over rice and garnished with a little sour cream (or cheese or both). Around here, I refer to them as β€œthose beans you like.” As in:

Husband: β€œBeans??? For dinner???”

Me: β€œDon’t worry. It’s those beans you like.”

It’s taken me ten years to convince the man that beans can be a main course. He didn’t even like beans when we met! These beans have gone a long way toward changing that crazy opinion. 

Black Beans and Peppers
white rice

As for the method, this is the easiest thing in the world, except perhaps for the need to plan ahead. The simplicity makes up for this! Just slice your peppers and onions, and place in your slow cooker with the dried beans and seasonings (except salt), add water and soak overnight. Turn the whole thing on low in the morning, and come home to a delicious pot of beans. A few finishing touches, and you’re on your way to dinner! 

If you don’t have a slow cooker, I’ve included instructions for the stovetop. You’ll notice the pictures are the stovetop version. The last time I made these, I forgot to soak it all overnight and had to make it in real time. I will tell you, I prefer the slow cooker version, and not just because we ate dinner at 9:00 pm that day.


Cuban Black Beans

Adapted from The Saucy Southerner

  • 1 bag dry black beans (1 pound). Pick them over to make sure there are no small stones, and give them a good rinse.
  • 1 large white onion, sliced into half moons
  • 1 large green bell pepper, sliced into strips
  • 1 large red bell pepper, sliced into strips
  • 4 bay leaves
  • 4 cloves of garlic, smashed and peeled
  • 1 tablespoon ground cumin
  • water
  • salt and pepper
  • 1 tablespoon apple cider vinegar
  • sour cream, queso fresco, scallions, hot sauce (all optional, for garnish)
  • cooked rice, for serving
  1. If making in a slow cooker, place dried beans, onion, peppers, cumin, garlic and bay leaves in the pot and cover with water, making sure the water covers the mixture by 1 inch.

  2. The next morning, check your water level. DO NOT DRAIN THE BEANS**. Make sure the beans have at least Β½ inch of water over the mixture. Keep in mind that you lose very little liquid from the slow cooker, and the onions and peppers will release water as they cook. You want a good balance between enough liquid to keep the beans from burning, but not too much, or you will have soupy beans (see notes). See step 6 if this happens.

  3. Turn the slow cooker on low, and set the timer for 6 hours. If yours does not have a timer, just set it to low. You won’t overcook these.

  4. If making on the stovetop, place your beans in a large, heavy-bottomed pot and cover with 2 inches of water. Bring to a boil, and removed from heat. Let beans soak for one hour.

  5. DO NOT DRAIN THE BEANS. Add your onions, peppers, garlic, cumin and bay leaves. Bring the mixture to a boil, and then reduce to a simmer. Continue to simmer until the beans are creamy, adding water as needed. This can take 1-2 (maybe more!) hours, so the slow cooker is definitely the easiest method. Add salt as you go, to taste.

  6. If you are using your slow cooker, you’ve just come home from work or errands, and its time to finish those beans. Depending on how much water there was in your slow cooker, and personal preference, you may want to cook them down a bit more. Transfer the mixture to a large pot, and simmer until creamy and stew-like. Add your salt, to taste. (If you are lucky enough to have a slow cooker insert that can go on the stovetop, obviously just use that.)

  7. For both methods, once you have your beans to the consistency you like, add in your apple cider vinegar. Add salt and pepper, to taste.

  8. Serve over rice, with whatever garnishes you like!

Notes:

  • If you have leftovers, they freeze beautifully, and go well in quesadillas, tacos, stirred into soup, with eggs, or just served as they are!

  • This is one of those dishes where you will want to add salt at the end. The whole thing reduces down A LOT, and so you risk adding too much if you try to season perfectly at the beginning.

  • Seriously, don’t drain the beans from the soaking water. This is where allllllll of the flavor is.