• Home
    • Recipes
    • The Roast Chicken Project
    • Allie Dreams of Cake
    • Sunday Suppers
  • Travel
  • About
Menu

Tea and Fog

Street Address
City, State, Zip
Phone Number

Your Custom Text Here

Tea and Fog

  • Home
  • Recipes
    • Recipes
    • The Roast Chicken Project
    • Allie Dreams of Cake
    • Sunday Suppers
  • Travel
  • About

A Birthday Cake for Harry

July 31, 2018 Allie
Harry Potter Birthday Cake

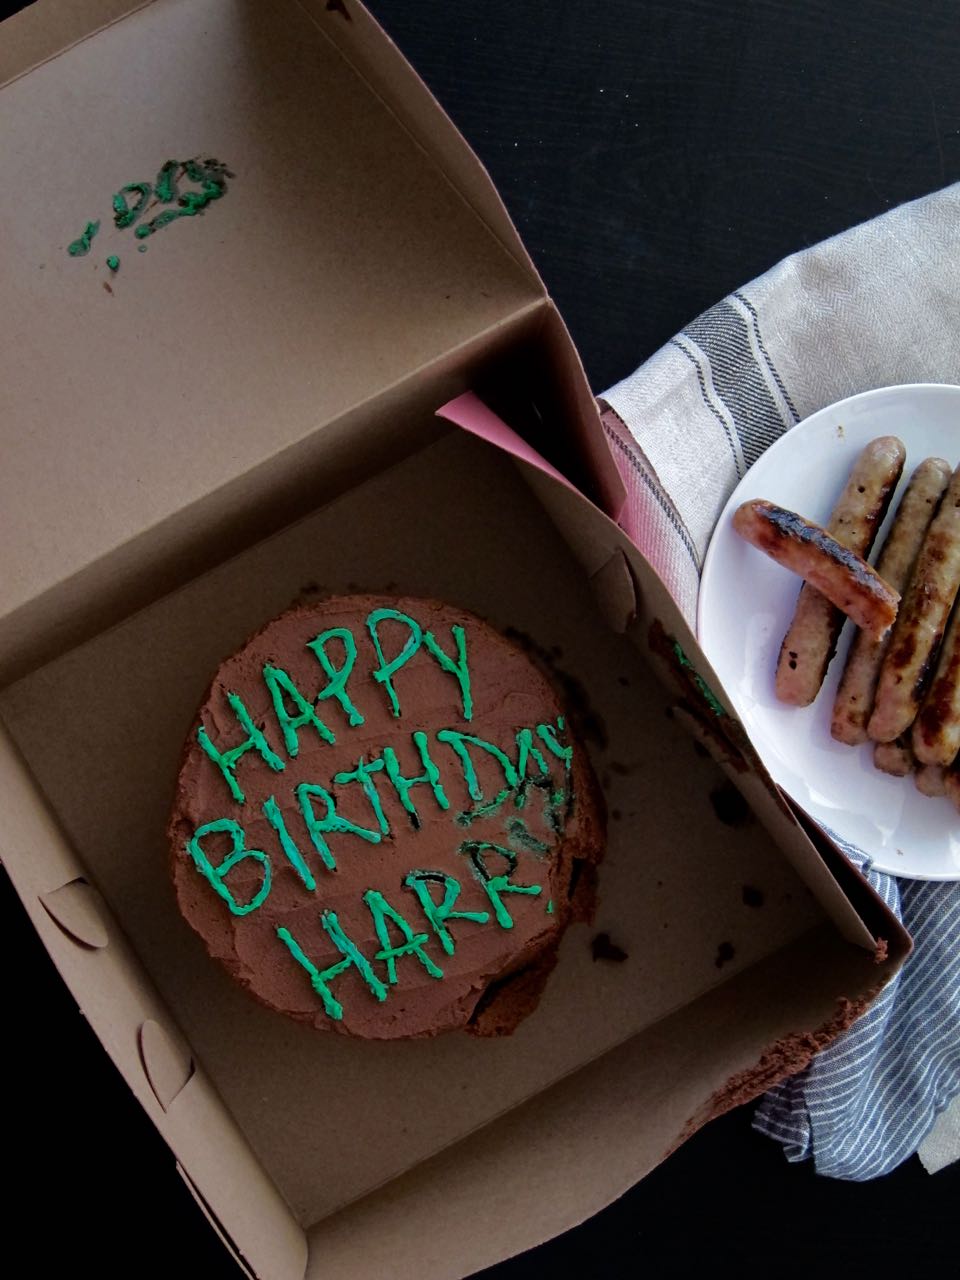
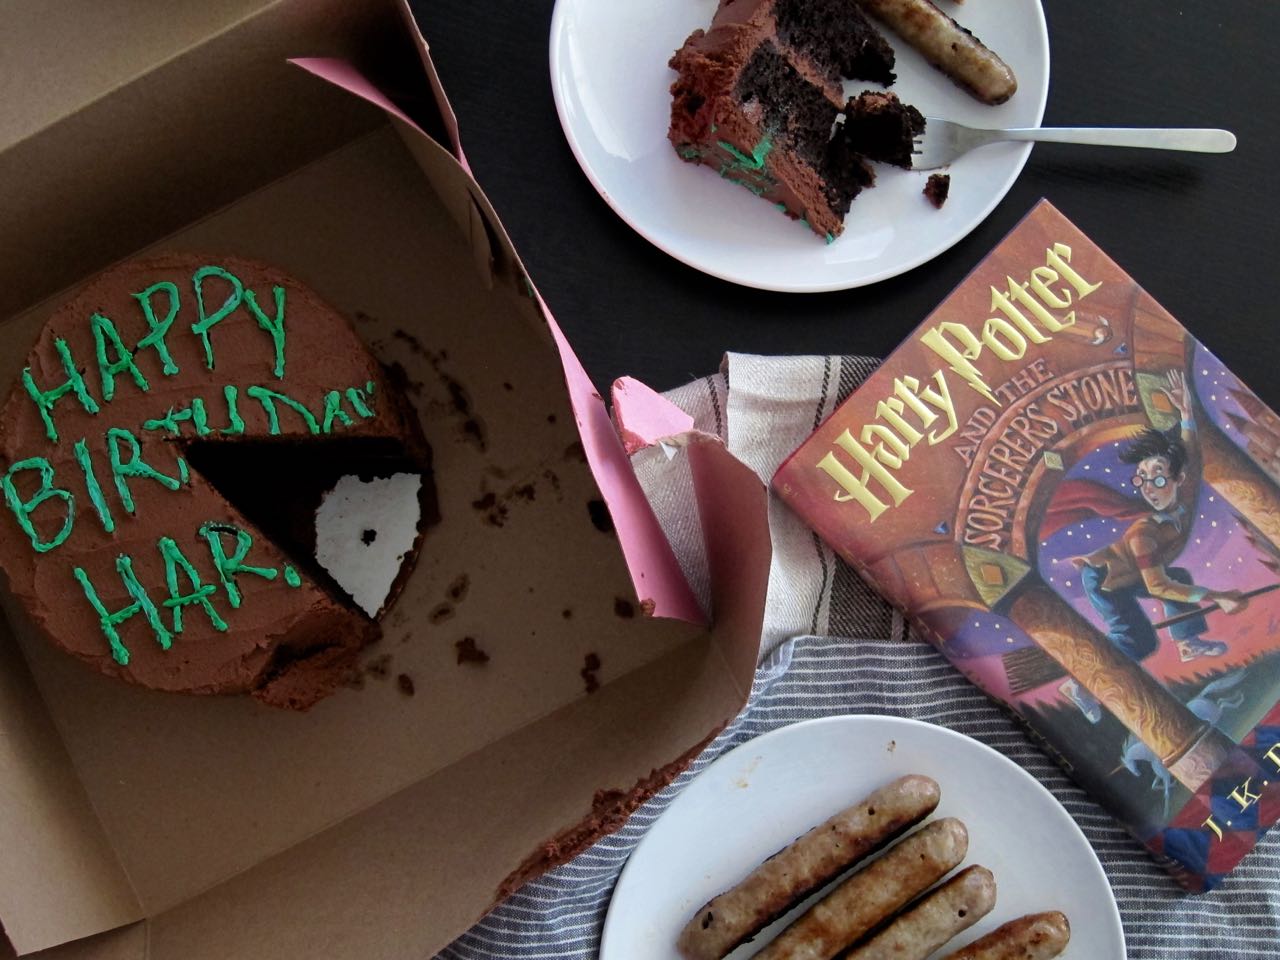
Happy Birthday Harry Potter!

Excuse me while my nerd flag flies high, but I love any excuse to stress bake a cake, and when I realized a certain fictional wizard's birthday was coming up, I decided to get a little whimsical. July 31st, aka, today, is the Chosen One's birthday, and why not recreate the cake Hagrid gave him for his 11th birthday? Mushed appearance and sausage links included too! 

It feels extra fun to celebrate this year, with more than just a Snapchat filter, because this September is also the 20-year anniversary of Harry Potter and the Sorcerer's Stone being released in the US. So in honor of that, enjoy this version of the "sticky chocolate cake" from the book! 

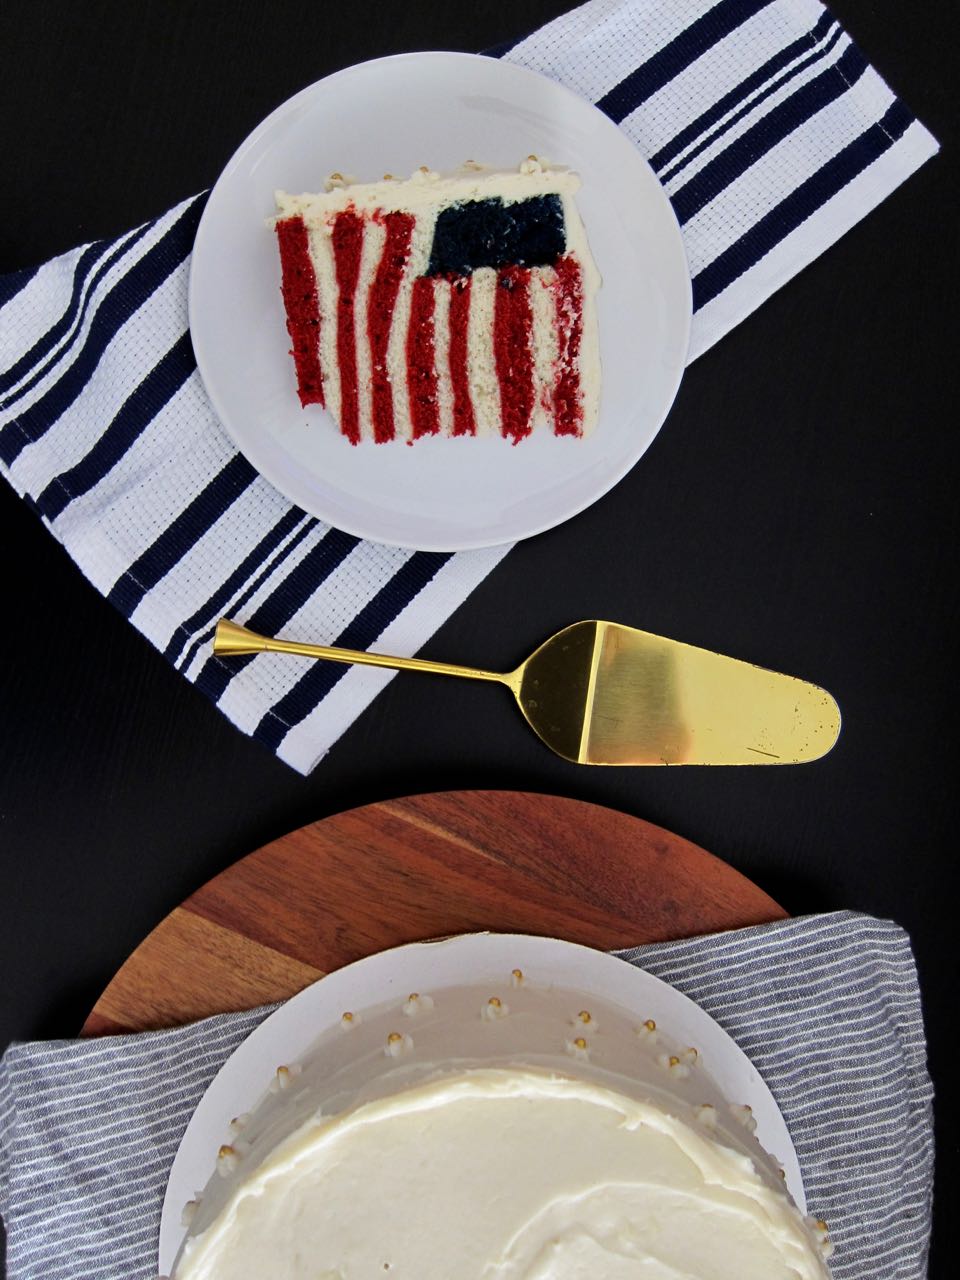
(I know the movie version was way more aesthetically attractive with its pink frosting and wacky spelling, but I'm going with the book description today. Maybe I'll make that other version in 2021.)

Happy Birthday Harry Chocolate Cake

Devils Food Cake

Adapted from Bravetart. Makes one, two-layer, 6-inch cake. This is the easiest chocolate cake ever. It all comes together in one pot, no special equipment necessary. 

For the cake:

  • 1 1/2 sticks butter
  • 3/4 cup strong black tea, such as Assam (see note)
  • 1/2 cup dutch process cocoa
  • 3 oz good quality dark chocolate
  • 1 cup light brown sugar
  • 1/2 tbs vanilla extract
  • 1/2 tsp kosher salt
  • 3 eggs + 3/4 oz egg yolks (about 1 1/2 tbs)
  • 1 cup flour
  • 1/2 tbs baking soda

For the Chocolate Ganache frosting:

  • 1 1/2 cup heavy cream
  • 10 oz milk chocolate
  • 1/8 tsp kosher salt

For any written decoration (optional)

  • 2 tbs softened butter
  • 3/8 cup powdered sugar, sifted
  • splash of vanilla extract
  • food color of choice
  1. Heat oven to 350 degrees. Line two 6-inch cake pans with parchment and spray with cooking spray. Set aside.
  2. In a large pot, combine the butter and black tea over low heat. When the butter is melted, remove from heat and whisk in the chocolate and the cocoa powder, then the brown sugar, vanilla, and kosher salt. Stir in the eggs and the yolks, then sift in the the flour and baking soda. Combine thoroughly, then divide between the two cake pans.
  3. Bake for 25-28 minutes, until cakes pull away from the edges of the pans a bit and a toothpick or skewer inserted into the cakes come out with only a few crumbs. Cool the cakes in the pans completely, then turn out and level tops as needed.
  4. When cakes are completely cool, make the frosting. Heat the heavy cream in another pot over medium heat until steaming and starting to bubble. Place the chopped milk chocolate in the bowl of a stand mixer and pour the cream over top. Whisk until smooth and chocolate is melted, then whisk in the salt. Set aside until cooled a bit, then cover and refrigerate at least 6 hours, or until mixture reaches 45 degrees. You can also set the bowl in an ice bath for an hour, stirring occasionally. When frosting is cooled to desired temperature, whip with the whisk attachment on medium-high, about 75-120 seconds, until thick and fluffy like frosting. Use immediately.
  5. Frost cake as desired.  If writing any messages on cake, beat together butter and powdered sugar, add vanilla and stir to combine. Color as desired, and transfer to a piping bag or ziploc bag. Cut off the tip and pipe away! Serve cake immediately, or keep at room temperature, covered, for up to one day, and sliced, wrapped in plastic, at room temperature for up to four days.

Notes:

  • You can use strong coffee in the place of the tea. The original recipe called for either, and I went with the tea because unlike coffee, I always have some in my house, and also, tea felt more British, in honor of Harry.

Β 

In Recipes, Allie Dreams of Cake Tags Dessert
Comment

Sunday Supper: Salt Baked Whole Fish

July 8, 2018 Allie
Salt Baked Whole Fish

There's something about baking an entire fish, head to tail, that tends to scare people off. I get it, since it took me a few tries not to be squeamish while staring into that milky eye whenever I order roasted fish in restaurants.

But the benefits of roasting a fish whole should really encourage more people to do it. It's cheaper per pound, since you aren't buying a precisely cut filet, and it's almost impossible to screw up, since roasting the meat around the bones and sealed in the skin makes it hard to overcook. Plus, you can stuff the cavity with all kinds of aromatics that give the fish lovely added flavor! 

Just don't stare the fish dead in its dead, white eyes and you'll be fine.

Here, I've taken the added step of encasing the fish in a salt crust, which both seasons the fish and steams it, yielding beautiful, delicious, moist fish. Serve it drizzled with a little olive oil and it is sublime. Also? Cracking into that baked crust is second only to the fun of breaking into a creme brulee.

Now, somebody just teach me how to properly flake this thing apart after cooking. Other recipes tell me it's a simple matter of pulling the flesh from the spine and lifting it off with a fork. My little pile of shredded fish was fun, but I don't think that's really how it was supposed to turn out. Hopefully you have better luck, and play a less dangerous guessing game with the pin bones.

Whole Fish Baked in Salt
salt packed stuffed whole fish
Baked Salt Packed Whole Fish
Stuffed Whole Fish.jpg
Filleted Whole baked fish.jpg
Salt Baked Fish Fillets

Whole Salt Baked Fish

Adapted from Dave Pasternack

  • one, 2 lb whole fish (or two, 1 lb whole fish) such as branzino, black bass, etc., cleaned and scaled
  • 2 lbs kosher salt or fine sea salt (about 3 cups)
  • 3 large egg whites
  • extra virgin olive oil, for brushing and serving
  • parsley, thyme, lemon slices, garlic, for stuffing
  1. Heat oven to 425. Bring fish to room temperature for 20 minutes. In a large bowl, mix salt and egg whites until mixture is the texture of moistened sand.
  2. Line a baking sheet with parchment paper and brush with oil. Sprinkle a bit of the salt mixture into a thin layer in roughly the shape of your fish. Brush fish with oil and set on top of the layer of salt. Stuff with sprigs of parsley, thyme, lemon slices and a clove of garlic in each fish, then top with remaining salt mixture and lightly pack. It's ok if tails and heads poke out a bit at the ends (if you manage to completely enclose your fish, use a skewer to poke a hole through the salt pack near where the head meets the body).
  3. Bake fish for 25 minutes, to about 135 degrees. Let stand 10 minutes, then crack the salt and discard. Brush off any excess salt, remove skin and stuffing, then debone and fillet the flesh (my strategy is to remove the top filets with a spoon, lift out the spine, remove any visible pin bones, and then chew VERY carefully while eating). Serve, drizzled with olive oil.
In Recipes, Sunday Suppers Tags Main Dish
Comment

American Flag Cake

July 2, 2018 Allie
American Flag Cake

Happy 4th of July! I hope you have fun things planned for celebrating tomorrow! I will be...not working, at the very least, so that will be a good way to Wednesday! I will also be eating a slice of this cake and some bonus dessert I made with the extras, so even though I'm struggling to feel patriotic these days, my insides will def be red, white, and blue!

So, how about this beauty? Can we pause for a sec and just look at this thing? I managed to impress even myself, and as my own biggest critic, that is hard to do. But this cake is an accomplishment, and I'm going to take a beat and recognize that. 

I took two cake recipes from my favorite cake book, American Cake, and mashed them together to create a tasty, edible flag. The red and blue layers are classic red velvet, dyed with shocking amounts of food dye (so sorry but it's just how you do it) and the white layers are my favorite cake of 2018, champagne (previously here and here). They get stacked with a little peach jam to make it all stick together, and then the whole tower gets wrapped in a cloak of tangy cream cheese frosting. I will pledge allegiance to that!

Before you look at this cake and think, "I could never do that, it's too much work," then let me assure you that, yes, yes it is definitely too much work. But you can still do it! I promise, the satisfaction of knowing your cake looks like a real flag with thirteen whole layers of red velvet and white champagne stripes is almost worth it! When you are building a masterpiece, you've gotta spend the time. 

Now, I say this after the fact, with a hazy recollection of the wee hours of last Friday morning and fresher memories of peoples' compliments. So maybe take everything I'm saying with a grain of salt. I did have my moments of wondering why oh why couldn't Betsy Ross just have stopped with two colors when sewing the flag? TWO WAS FINE! Because by the time I was baking yet a second blue layer the next day and trying to perfectly color match it to the first one, I was ready to call that long-dead lady some not-so-nice names. But again, I was making a masterpiece, and sacrifices will be made, such as sleep and time and adherence to FDA recommended levels of food dye. 

So I will warn you, the directions below are a tad involved. You can, of course, bake thicker layers and cut them into the thinner layers, but I don't have those torting skills and so I opted for the more time-consuming option of baking my layers individually. But, no matter which method you choose, don't worry too much about perfectly even, stacked layers. This is after all a cake, not a real flag, and you can just tell everyone that your sliced cake is supposed to look like it is waving in the wind o'er all those ramparts. Ta da!

American flag inside cake
sparkler cake
Frosting American Flag Cake.jpg
Decorating American Flag cake.jpg
cream cheese frosting on cake.jpg
surprise american flag cake.jpg
American flag cake slice

Red & Blue Velvet Champagne Cake with Cream Cheese Frosting

Red & Blue Velvet Cake and Champagne Cake layers adapted from Anne Byrn. You will want to make the full recipe for each color, to make sure you have enough batter for all the layers plus any extra for mistakes (trust me). In total, you will need three 8-inch red layers, three 8-inch white layers, four 6-inch red layers, three 6-inch white layers and two 8-inch blue layers, so plan accordingly.

For Red & Blue Layers: make 1 full recipe for each color

  • 1/2 cup unsalted butter, softened
  • 1 1/2 cups sugar
  • 2 eggs, at room temperature
  • 2 tsp vanilla
  • 1 tbs red food coloring (for blue, use 2 tbs royal blue food coloring + 1-2 drops violet)
  • 2 1/2 cups all purpose flour
  • 3 tbs unsweetened cocoa powder
  • 1/2 tsp kosher salt
  • 1 cup milk, room temperature
  • 1 tbs white vinegar
  • 1 tsp baking soda

For White Layers:

  • 2 1/2 cups cake flour (see notes)
  • 2 1/2 tsp baking powder
  • scant 1/2 tsp kosher salt
  • 5 egg whites, room temp
  • 1/2 cup + 1/3 cup dry champagne, room temperature
  • 1 2/3 tsp vanilla
  • 1 tbs + 2 tsp vegetable oil
  • 1 1/3 cup sugar
  • 1 stick + 1/3 cup unsalted butter, room temperature

For assembly and the frosting:

  • 3/4 cup peach jam
  • 2 sticks unsalted butter, room temperature
  • 2 packages (16 oz) cream cheese, room temperature
  • 8 cups powdered sugar, sifted
  • 2 tsp vanilla extract
  1. Make the red and blue layers, one at a time: place a rack in the center of oven and heat oven to 350 degrees. Butter and flour as many 8-inch and 6-inch cake pans as you have, or use disposable pans. For the red layers you will need three 8-inch pans and four 6-inch pans; for the blue, you will only need two 8-inch pans.
  2. Decide which color you are starting with, and make one recipe of the velvet cake: Put the butter and sugar in the bowl of a stand mixer or large mixing bowl, and beat on medium speed until light and fluffy, about 3 minutes. Add the eggs, one at a time, then blend in the vanilla and the food coloring and set aside. 
  3. In a separate, large bowl, sift together the flour, cocoa and salt. In a measuring cup, stir together the milk, vinegar, and baking soda. Add the dry and wet ingredients to the batter while mixing on low speed, alternating, and beginning and ending with the dry ingredients. Scrape down the bowl as needed.
  4. Divide the batter between prepared pans: for the red layers, spread two heaping spoonfuls of batter (see notes) evenly in each 6-inch pan (4 total) and three heaping spoonfuls in each 8-inch pan (3 total). For the blue layers, divide the batter evenly between two prepared 8-inch pans.
  5. For red layers, bake the cakes for 6-8 minutes for 6-inch layers and 8-9 minutes for 8-inch layers. For blue layers, bake 22-25 minutes, until a toothpick inserted in the middle comes out clean and the layers are pulling slightly away from the edges of the pans. Let layers cool slightly in pans and then turn out to cool completely on a wire rack.
  6. Make the batter again for your second color (red or blue) and repeat.
  7. Make the white layers: Again, butter and flour your pans. You will need three each of the 8-inch and 6-inch layers.
  8. Sift together cake flour, baking powder, and salt in a medium bowl and set aside. In a separate large bowl, add the egg whites, champagne, vanilla and oil and whisk to combine well. Set aside.
  9. In the bowl of a stand mixer, beat sugar and butter for 3-4 minutes on medium speed until light and fluffy. Add the flour mixture and the egg white mixture, alternating, starting and ending with the dry mixture. Scrape down sides of bowl as needed. Divide the batter between pans, spreading 2 heaping spoonfuls of batter in each 6-inch pan and 3 heaping spoonfuls in each 8-inch pan.
  10. Bake, 6-8 minutes for 6-inch layers and 8-10 minutes for 8-inch layers, until cakes are just beginning to pull back from the sides of the pans. Cool on a rack for a few minutes, remove from pans and cool completely.
  11. When ready to assemble, heat peach jam in a small saucepan over low heat until it thins out a little. Place a red, 8-inch cake layer on a cake board and brush a thin layer of the warm jam over the top using a pastry brush or back of a small spoon. Place a white 8-inch layer on top and brush with jam, then top with a red layer. Repeat until you have three each of the red and white layers. 
  12. Trim off any rounded tops from your blue cake layers, then, using a 6-inch cake ring or 6-inch diameter bowl to cut a 6-inch circle out of your blue cake layers. Stack the first 8-inch ring on top of your stacked red and white layers, then brush the inside and top of the blue layer with jam. Gently place a red 6-inch layer inside the blue ring, brush with jam, and top with a white 6-inch layer. Brush with jam and top with a red layer, and repeat, until you have 4 red layers and 3 white 6-inch layers. The top layer should be red. Brush the sides of the exposed red and white 6-inch layers and then gently lower the remaining blue 8-inch ring of cake over the top and sides. The top of the blue layer and last red layer should be relatively flush with each other, but it doesn't have to be exact. The difference just shouldn't be so extreme that you can't hide it with frosting.
  13. Make the frosting and ice the cake! In the bowl of a stand mixer, beat together butter and cream cheese until smooth and creamy and well-blended. Slowly add in the sifted powdered sugar until fully combined and frosting is stiff but spreadable. Mix in the vanilla and beat for a minute to make sure frosting is as fluffy as can be. Spread a bit of the frosting over the sides and top of the cake to smooth out any crumbs. Chill cake for 20 minutes, then frost with remaining frosting as desired. Slice and serve!

Notes:

  • I'm sorry to call for 2 kinds of flour, but the champagne cake really gets its amazing texture from using the cake flour, while the red velvet can hold up to using regular AP flour. 
  • When I saying "heaping spoonful" for spreading the batters in the pans, I'm talking about regular-sized spoons you'd use for eating, not serving spoons or little teaspoons. You should have enough batter in each pan to fully cover the bottoms but only come up the sides about 1/4 inch, no more than 1/2 inch. I wish I had been more scientific in my measurements but this part was happening around 1 am, so I was not.

Β 

In Recipes, Allie Dreams of Cake Tags Dessert
Comment
← Newer Posts Older Posts →

For those who plan their next meal while eating the last.

Β 

INSTAGRAM

🎢When pizza’s on a bagel*, you can have pizza anytime**!🎢

*donut
** after you fry some donuts
FINALLY perfected these Burnt Honey Butter Biscuits & what good timing! It’s carb season & we are all hibernating! 🐻
Final thoughts on Small Thanksgiving: take your sweet potato + marshmallow combo firmly into dessert or even breakfast, and consider a cozy mashed potato soup with stuffing croutons to use up those leftovers. Stay safe & Happy Thanksgiving! πŸ˜·πŸ¦ƒ
Part 2 of Small Thanksgiving: all the stuff to stuff yourself with! An Italian sausage pasta-inspired stuffing and a vegetarian, spiced wild rice stuffed squash. Everything serves 4-6, gather safely this year! πŸ˜·πŸ¦ƒ #thanksgiving #smallthanksgiving #v
Now that we (and the world?) can let out that collective sigh of relief, I can  finally think about my favorite holiday! Everyone is probably (hopefully 😷)looking at smaller gatherings this year, so I’m sending some Small Thanksgiving ideas ou
So happy Disney keeps justifying my dumb baking purchases! This matcha shortbread is delicious, but make a good sandwich cookie it does not. I hid all the broken pieces πŸ™ˆ
Subscribe to Tea and Fog!

RECENT RECIPES

Featured
polenta with rosemary and goat cheese.jpeg
Salmon Wellington and Warm Rice Salad.jpeg
Pizza Donut Hero.jpeg
Burnt Honey Butter Biscuits.jpeg
Mashed Potato Soup with Stuffing croutons.jpeg
sweet potato donuts with marshmallow frosting.jpeg