• Home
    • Recipes
    • The Roast Chicken Project
    • Allie Dreams of Cake
    • Sunday Suppers
  • Travel
  • About
Menu

Tea and Fog

Street Address
City, State, Zip
Phone Number

Your Custom Text Here

Tea and Fog

  • Home
  • Recipes
    • Recipes
    • The Roast Chicken Project
    • Allie Dreams of Cake
    • Sunday Suppers
  • Travel
  • About

Strawberry Frosted Donut Cake

June 8, 2018 Allie
giant strawberry donut cake

Tomorrow is my birthday!   Ginny is magically going to be in town, and she's given me the gift of staying in and cooking for her and her sister and some friends. If you know me, you know this is all I want! I'm making two Zuni Chickens, cheesy potatoes, and someone else is in charge of dessert. 32 is off to a good start!

But if I were doing dessert, this giant donut would be a worthy candidate for a birthday cake. It looks like a donut, but behaves like a cake. It's got size enough to feed a crowd and plenty of surface area for candles, if you need it. My donut obsession finally bled into my cake obsession and I suppose it was only a matter of time.

Cakes are baked, and it might be a more logical leap to turn baked donuts into a cake, but today I'm talking about the OG of donuts, the fried donut. It is the best donut, no question! Baked donuts are easier and quicker to make, and certainly less dangerous to cook, but there is something irreplaceable to me about the deep fried, doughy version. And when I decided to make a giant donut, I knew this was the way I was going to do it.

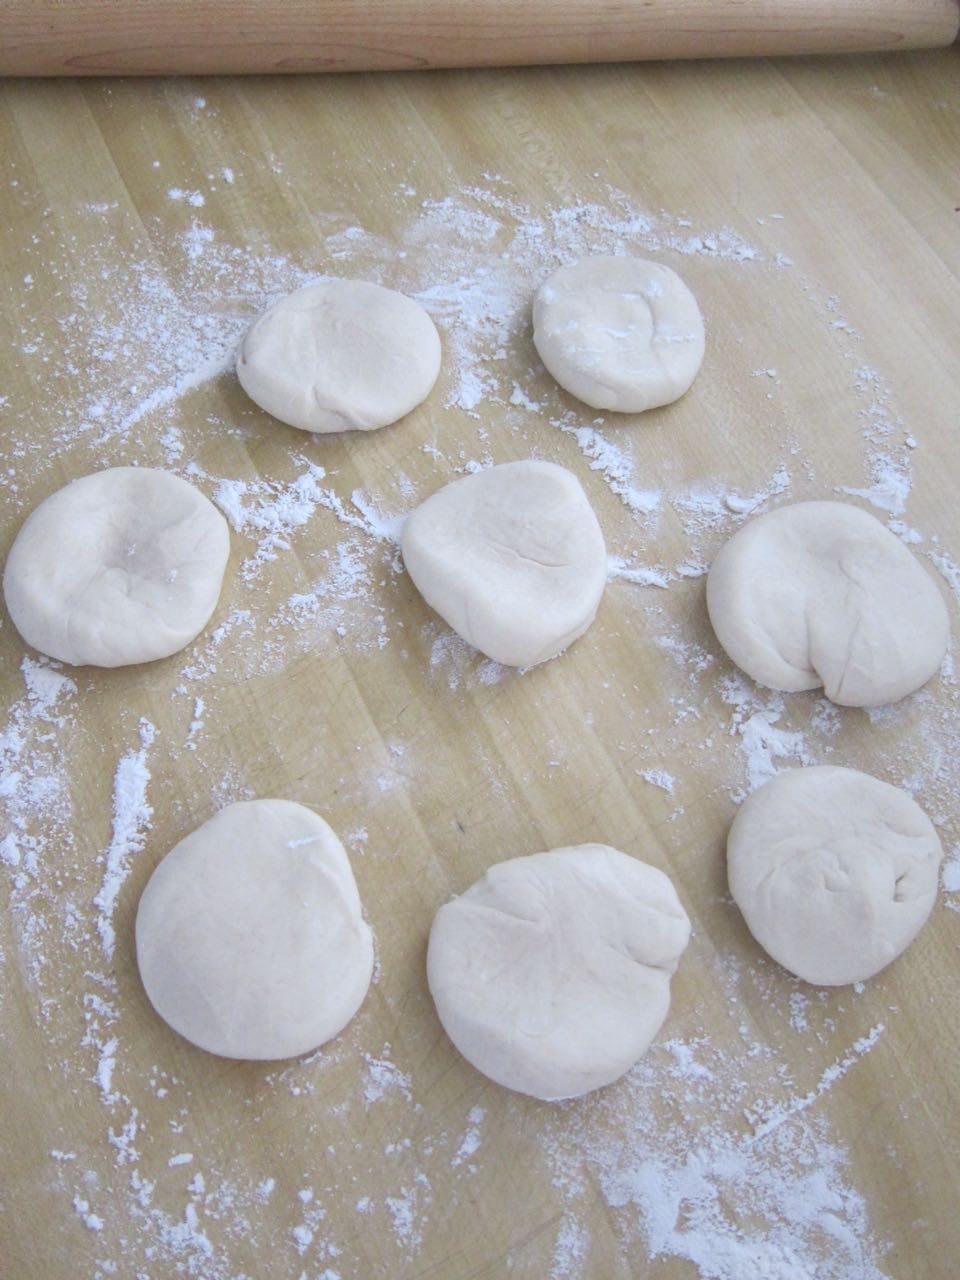
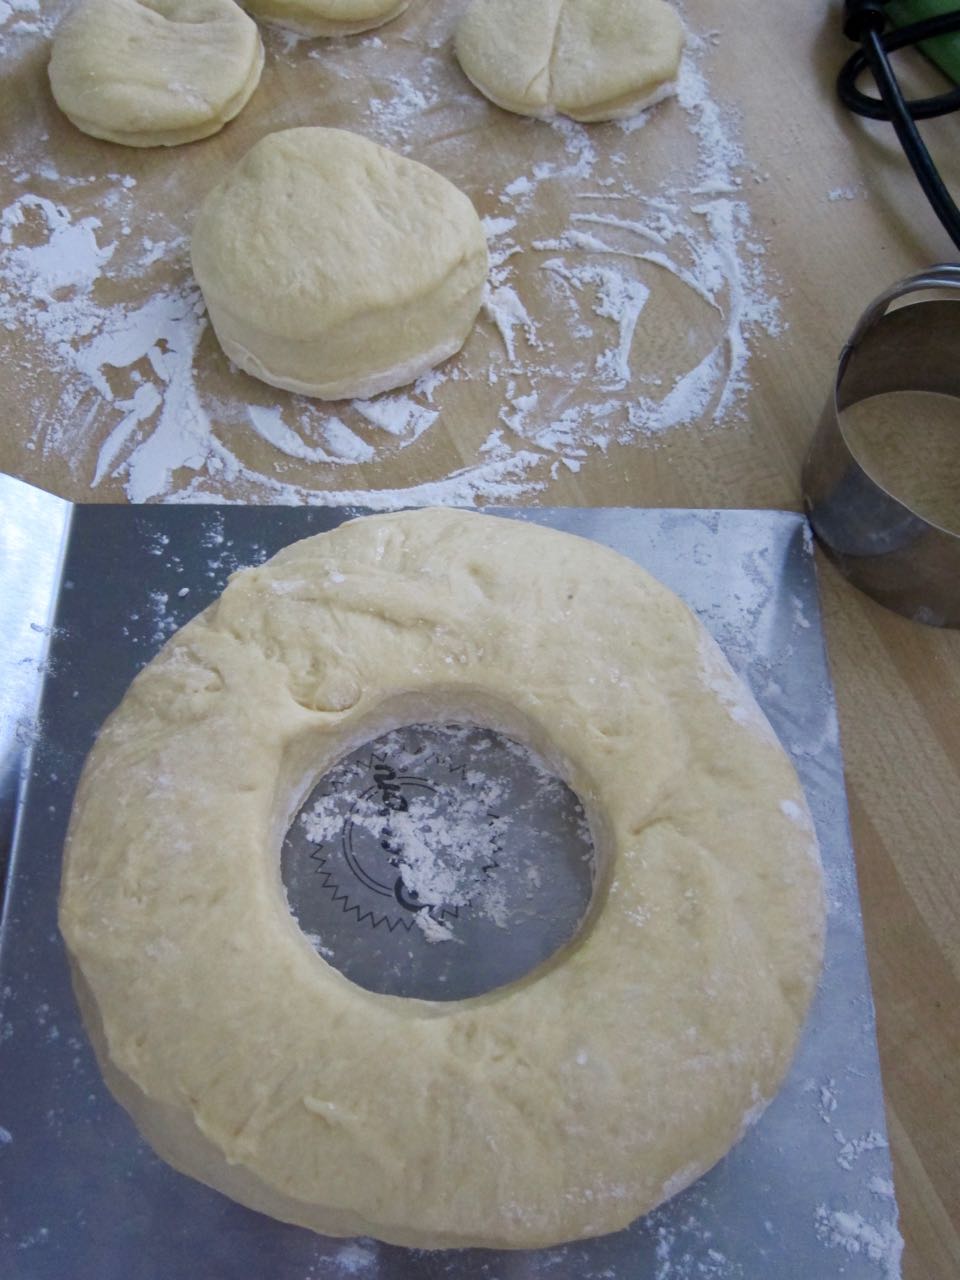
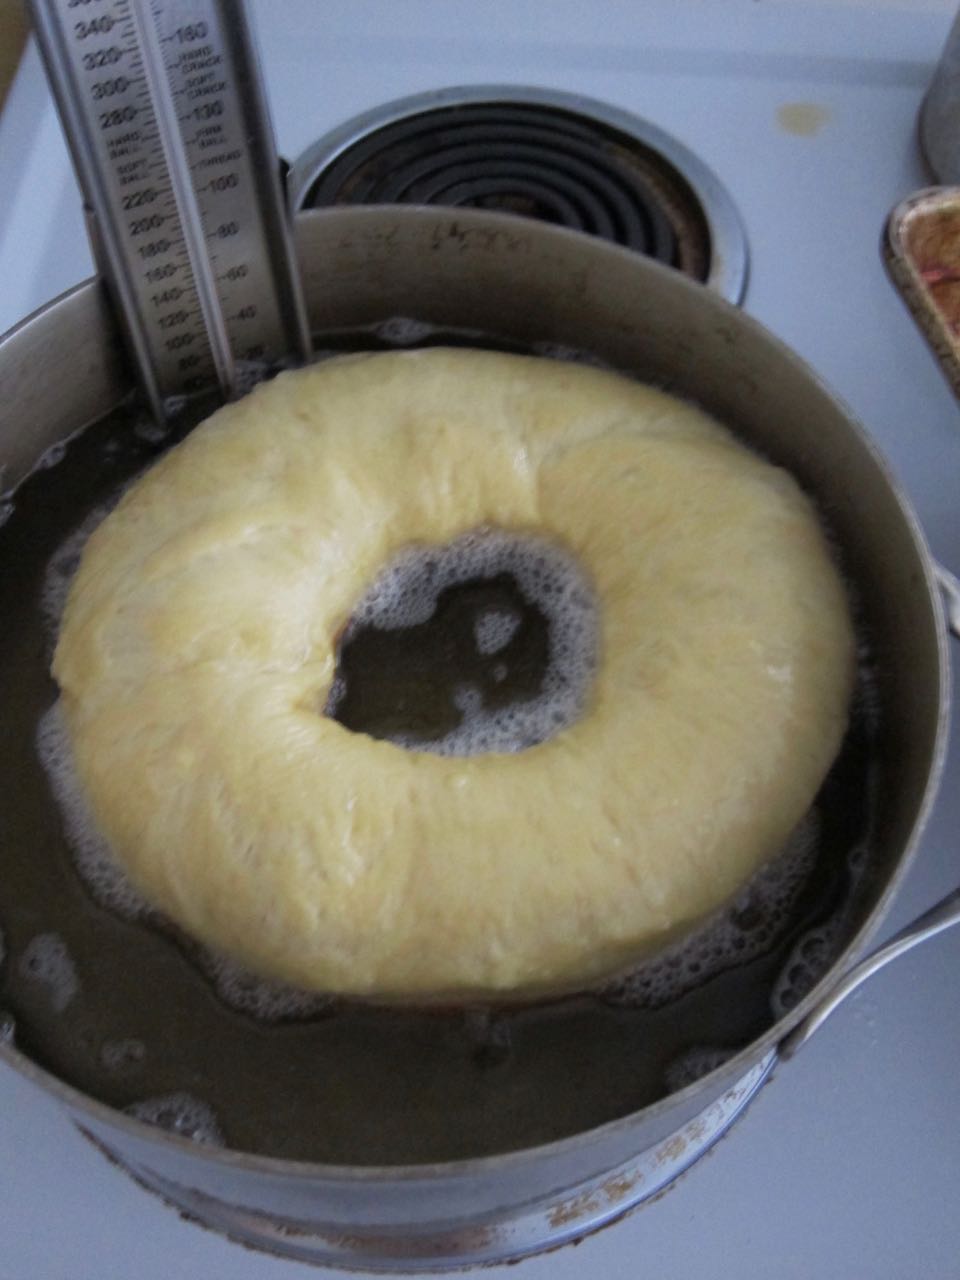
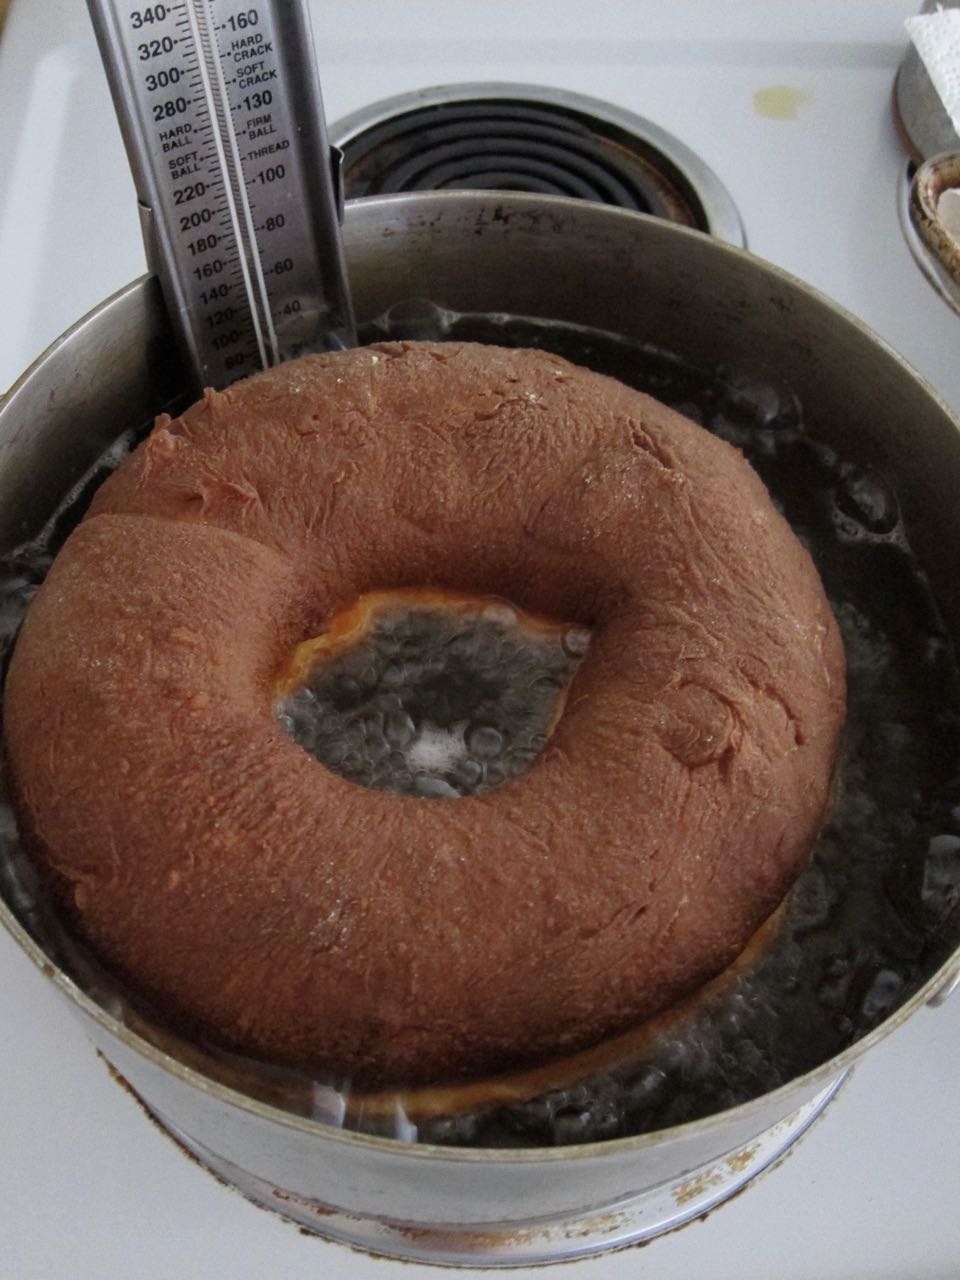
I made a batch of dough, cut out a 6-inch circle with a cake ring and a 2-inch biscuit cutter. Then I fried it. The trick is not to be scared! Yes, you are dunking an unwieldy slab of dough into hot oil, but with patience and the right tools, you can avoid maiming yourself. 

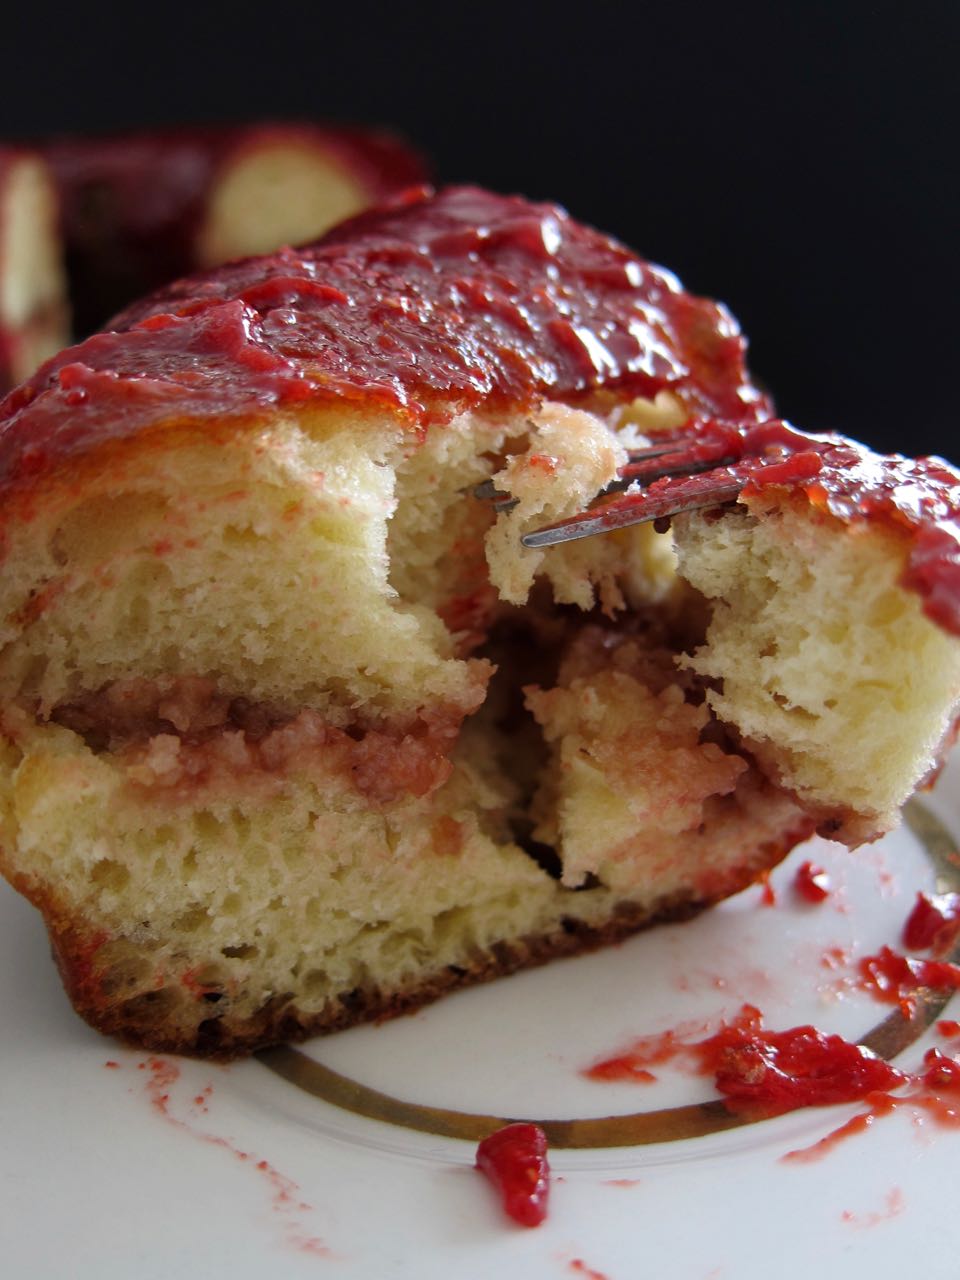
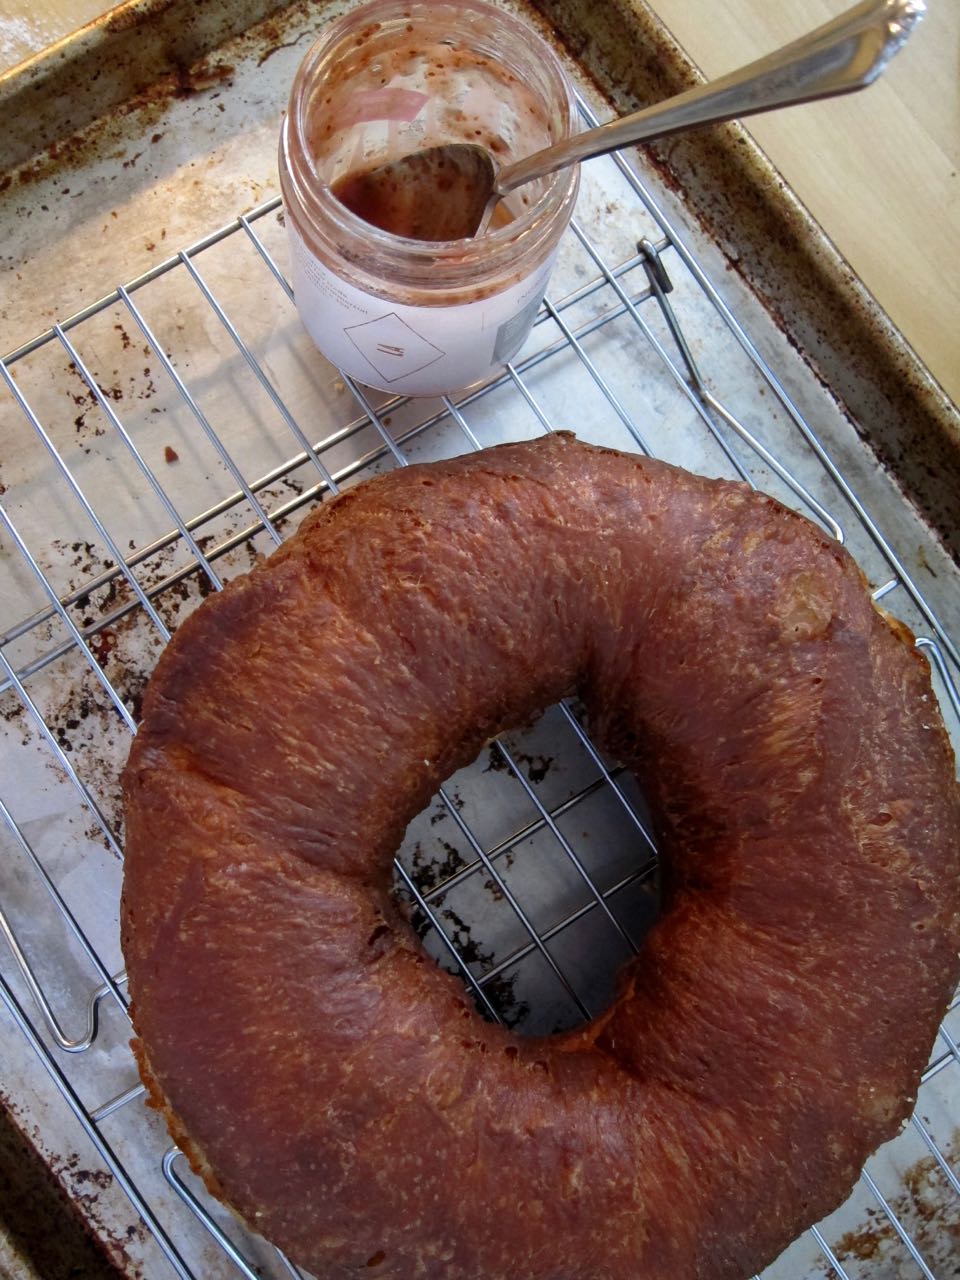
The giant donut turns into a cake with a filling of jam. The secret, to me, is not too much jam. I just want enough to clearly create layers, but not enough to veer into squishy, jelly donut territory. Though, side note, today is apparently International Jelly-Filled Doughnut day, so this cake feels extra-appropriate! 

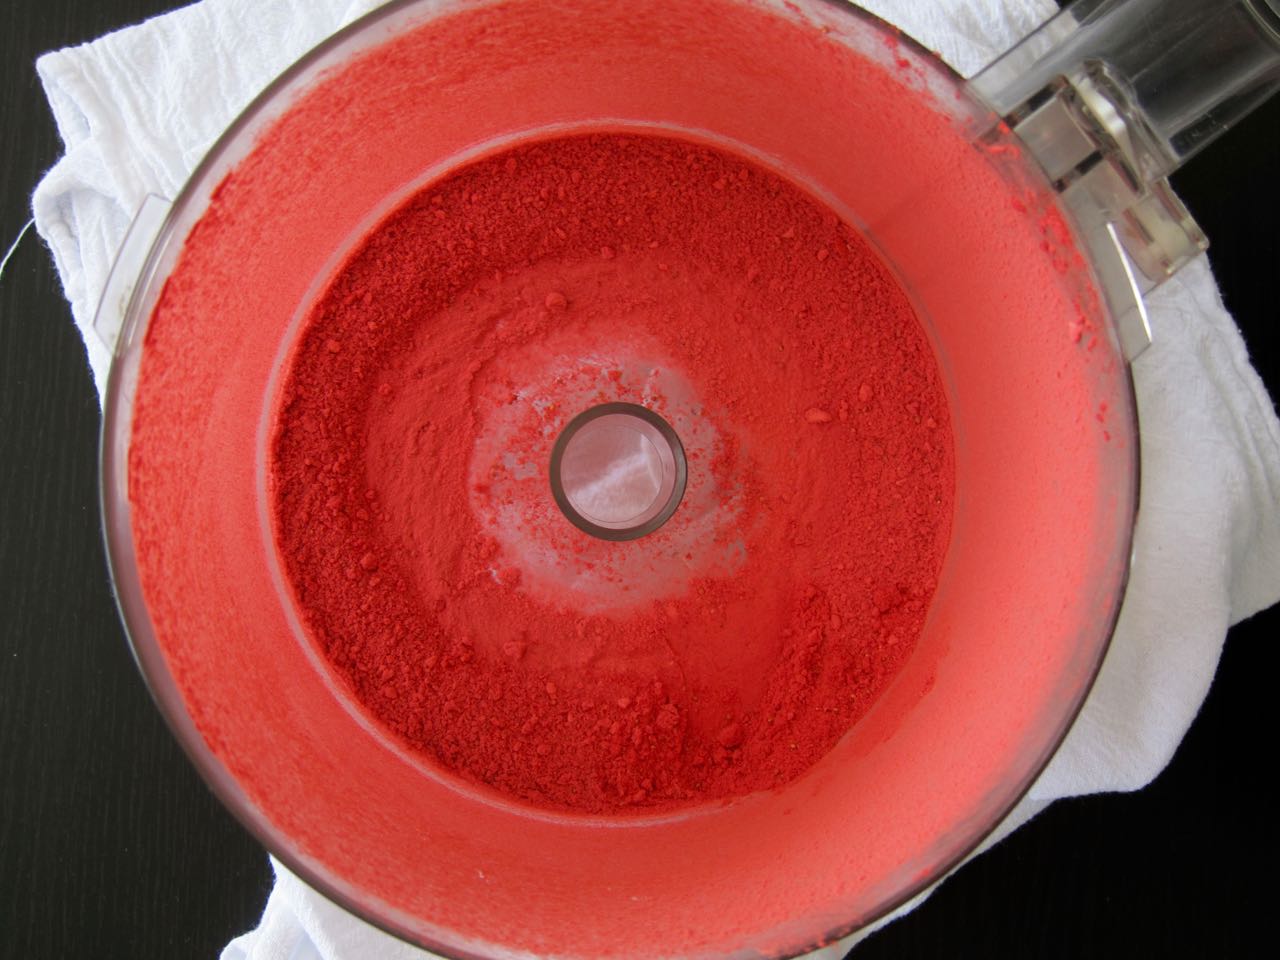
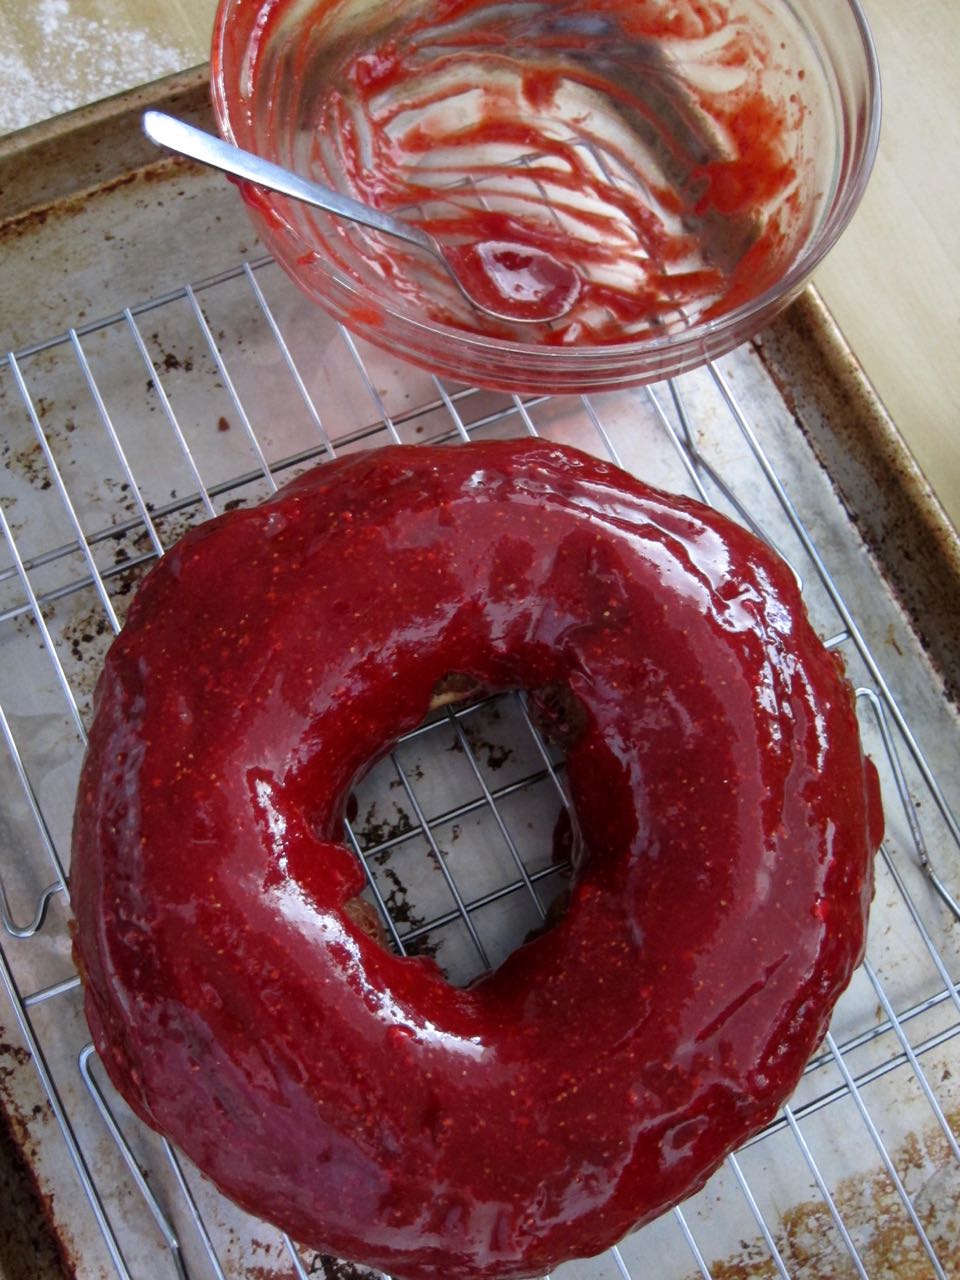
I cut the donut in half through the middle while still warm, then spooned on the last of my seascape strawberry & rose geranium jam from Sqirl. A worthy sacrifice, I think. I then put the pieces back together and glazed the whole thing with a tart strawberry glaze made from freeze-dried strawberries and sugar that contrasted so well with the sweeter jam filling. The end result is a doughnut you can slice and eat with a fork, or just indulge yourself and pick it up with your hands. It is a donut after all!

giant doughnut cake
eating giant donut politely
strawberry powder.jpg
cut out giant donut dough.jpg
frying giant donut.jpg
frying giant donut side 2.jpg
filling giant donut.jpg
glazing giant donut.jpg
glaze dripping off diant donut
eating giant donut impolitely

Strawberry Glazed Donut Cake

Doughnut recipe adapted from Joy the Baker

For the dough:

  • 1 package active dry yeast
  • 2 tbs warm water
  • 1 cup whole milk, slightly warmed
  • 1/4 cup unsalted butter, room temperature
  • 3 large egg yolks
  • 3 1/2 cup flour, plus more for dusting
  • 2 tbs sugar
  • 1 1/2 tsp kosher salt
  • 2 qts oil, for frying

For the glaze:

  • one package freeze dried strawberries (1.2 oz)
  • 3/4 cup confectioners sugar
  • 2-3 tbs lemon juice or water
  • strawberry jam, for filling 
  1. In the bowl of a stand mixer, stir together yeast and warm water until the yeast dissolves. Let rest until foamy, about 5 minutes.
  2. Add the warmed milk, butter, egg yolks, flour, sugar and salt to the bowl. Mix with the dough hook on low speed for 5 minutes until a soft dough forms. Beat on medium high for 3 minutes until the dough pulls away from the sides of the bowl. Remove the dough hook and scrape the dough into the middle of the bowl. Sprinkle lightly with flour, cover the bowl with plastic wrap, and let rise in a warm place until doubled, about 1 1/2-2 hours.
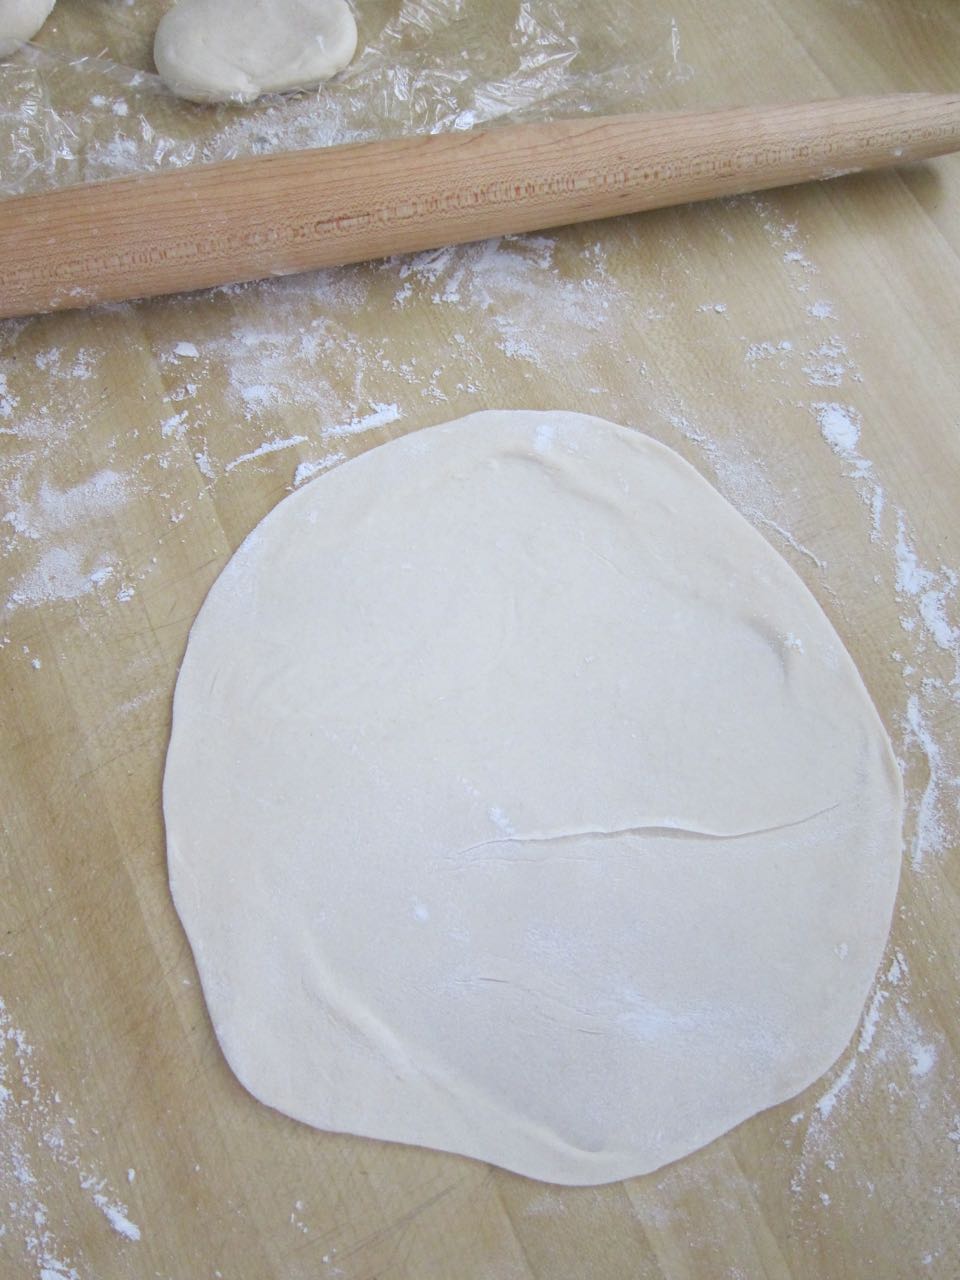
  3. When dough is almost done rising, heat a large pot of oil to 350 degrees. Dust a flat surface generously with flour, then turn the dough out and flatten slightly into a round. Transfer the round onto a large flat spatula or cake spatula. Cut the dough into a large circle, 6-7 inches in diameter (easy with a cake ring), then cut out the center of the round with a 3 inch round cutter, being careful not to twist the cutter as you cut down on the dough. 
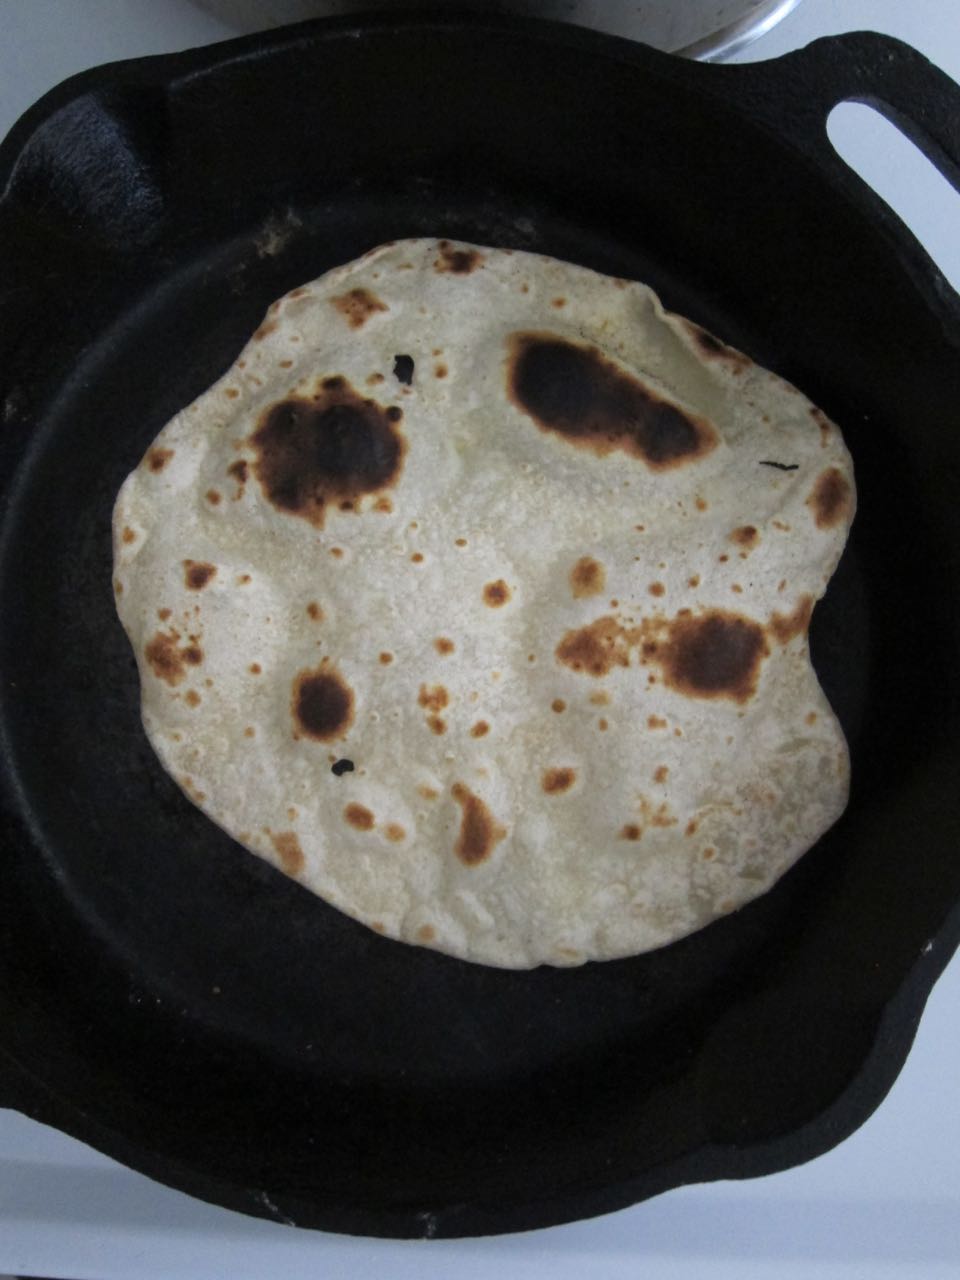
  4. Gently shake the cut dough back and forth on the spatula to make sure it releases easily, adding a little more flour underneath if necessary. When oil is at temperature, gently ease the dough into the oil. Fry for 5 minutes and then flip, using two spatulas or wooden spoons to ease the dough over in the oil. Cook for 5 minutes more, then gently lift out of the oil with the spatulas.
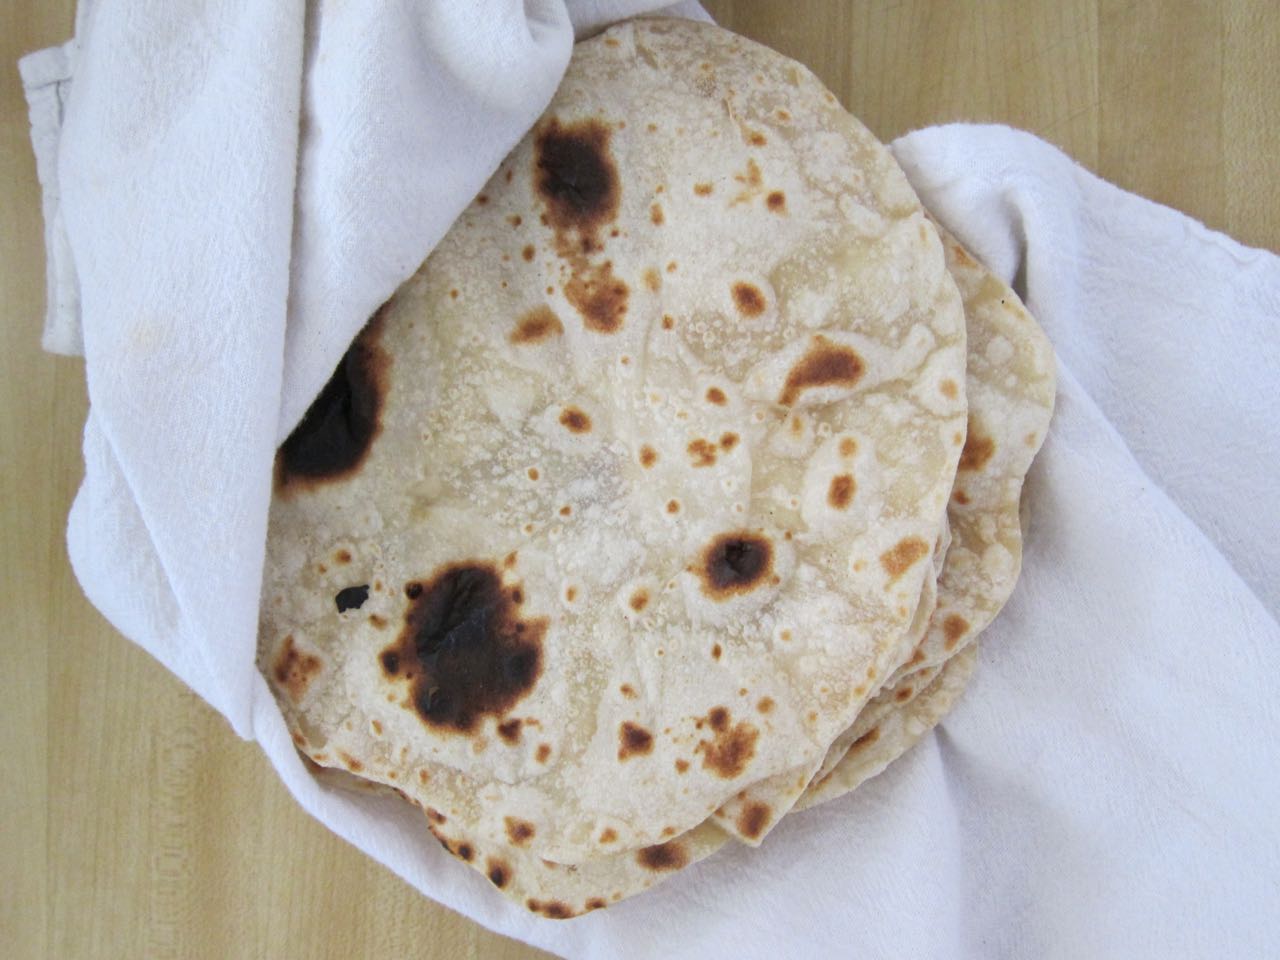
  5. Drain the doughnut. Let cool slightly then cut in half horizontally. Fill with jam, then place halves back together. 
  6. Prepare the glaze: Blend strawberries in the bowl of a food processor until fine, then sift with the sugar. Whisk in the lemon juice or water until you have a pourable but not too thin consistency. Pour over the doughnut and let set. When completely cool, slice and serve.
In Recipes, Allie Dreams of Cake Tags Dessert
Comment

Carne Asada with Pico de Gallo and Homemade Tortillas

June 3, 2018 Allie
carne asada feast

I'm looking at that pink-centered meat and I don't even know who I am anymore! It's so beautiful and doesn't gross me out in any way whatever. My younger self is recoiling in horror. Maybe there is hope for sushi yet?

The carne asada I'm drooling over is from Roy Choi. Skirt steak gets dunked in a flavorful marinade infused with mirin and citrus, then grilled or broiled to perfect tenderness. The accompanying pico de gallo gets a slight Korean twist of heat through some gochujang, and together, they are really pretty excellent! I first tried out this recipe a few years ago for a beach vacation, and while it was delicious, it also suffered from the lessons I learned about cooking for and feeding a group of 18 friends, so I was eager to try it again in the quiet and calm of my own kitchen. I'm so happy I did.

Aside from the beef, the other stars of this show are the tortillas. Have you tried making your own before? I've done corn tortillas a few times, but I hadn't really ever attempted flour tortillas, ever since Claire and I took a tapas cooking class together in Boston where the group making the tortillas produced more of a chewy, flavorless flatbread. But Claire had told me that the recipe in Mark Bittman's baking book was delicious and easy, and who am I to argue with Bittman? I made a batch one day to use up some leftover Bo saam, and blew myself away with my skillz. These are far easier and quicker to make than you'd imagine, and if you use a good butter or oil and plenty of salt, not at all like a bland flatbread! I haven't bought tortillas in two months.

You can make the pico de gallo ahead of time, when you add the meat to the marinade. The flavors will be even better incorporated after a sleep in the fridge. You can roll and cook the tortillas in advance as well, or just before you want to cook the meat. They will stay warm and soft tucked into a towel. Once you've got your meet cooked to perfection, slice it and serve with the pico and maybe some charred scallions, and tuck it all into your perfect tortillas. Serve with beer and you are having your best Sunday ever.

carne asada with pico de gallo and tortillas
Pico de gallo
tortilla dough.jpg
rolling flour tortillas.jpg
cooking flour tortillas.jpg
homemade flour tortillas.jpg
carne asada
Carne Asada with homemade tortillas

Carne Asada with Pico de Gallo and Homemade Tortillas

Carne Asada and Pico de Gallo from Roy Choi via Sam Sifton, tortillas from Mark Bittman

For the Carne Asada:

  • 2 jalapeΓ±os
  • 1 medium tomato, cored and cut into quarters
  • 1 small yellow onion, peeled and cut into quarters
  • 5 cloves garlic
  • 2 tablespoons granulated sugar
  • ΒΌ cup ancho chili powder
  • 1 tablespoon ground black pepper
  • 1 tablespoon kosher salt
  • Β½ large bunch cilantro, leaves and stems, well rinsed
  • β…“ cup fresh-squeezed orange juice (from about 1 orange)
  • 3 tablespoons fresh-squeezed lime juice (from 1 or 2 limes)
  • ΒΌ cup mirin
  • 1 12-ounce can (1 1/2 cups) Mexican lager beer (I used Corona)
  • 1.5-2 pounds skirt steak, cut into a few large pieces
  • 2 tablespoons olive oil

For the Pico de gallo

  • Β½ red onion, peeled and chopped finely
  • Β½ bunch cilantro, both leaves and stems, roughly chopped
  • 3 scallions, white and green parts, thinly sliced
  • 5 medium tomatoes,  and chopped into a small dice
  • 1 tablespoon gochujang
  • 1 tablespoon kosher salt
  •  Juice of 1 lime, plus more to taste

For the tortillas:

  • 1 1/2 cups flour plus more for rolling
  • 1/2 tsp salt
  • 2 tbs fat (neutral oil, olive oil, or softened butter)
  • 1/2 cup boiling water
  1. Make the marinade: Heat your oven's broiler and roast the jalapenos on a baking sheet, turning as needed, until the skins are black, blistered and charred. Place peppers in a plastic, sealable bag or wrap in foil and let steam for a few minutes. Then remove and peel jalapenos, discarding the skins, stems and seeds. 
  2. Place the jalapenos in a blender, along with the tomato, onion, garlic, sugar, chili powder, black pepper, and salt and pulse to blend. Add the cilantro, orange juice, lime juice, mirin, and beer and blend until you have a smooth marinade. Place the pieces of beef into a large gallon sealable bag or in a large bowl and cover with the marinade. Seal the bag or cover the bowl with plastic wrap and refrigerate overnight or for at least 4 hours.
  3. Make the pico de gallo: In a large bowl, combine all ingredients. Taste, and adjust for salt and add more lime juice if you want. Cover and refrigerate until needed. 
  4. Make the tortilla dough: In a food processor or in a large bowl, combine flour and salt. Pulse in (or stir) the fat until incorporated throughout. Add the boiling water and pulse to combine until the dough forms a ball. If using a food processor, run for another minute, and if not, knead the dough for about 5 minutes on a lightly floured counter. Wrap dough in plastic and let rest at least 30 minutes at room temperature. At this point, you can refrigerate it until you need it, but make sure you bring it back to room temperature before rolling tortillas.
  5. When you are ready to cook, heat a grill on high, an oven to high heat, or turn on your broiler. If using the oven, preheat a baking sheet.
  6. Make the tortillas: divide the dough into 8 pieces and roll into balls. Let rest on a lightly floured surface, covered, for about 10 minutes. Heat a large, heavy skillet (cast iron is best) over medium-high heat. Roll the tortillas out into circles one at a time (or you can use a tortilla press if you own one) to as thin as possible, at least 8 inches across. Place the rolled dough onto the hot skillet and cook 1-2 minutes, until dough turns opaque and brown spots begin to appear. Flip and cook another minute on the other side. Adjust the heat as needed and repeat with remaining dough, tucking the cooked tortillas into a clean kitchen towel to stay warm.
  7. Cook the meat: to your heated grill or oven, place the meat (on a pre-heated baking sheet please if using the oven) and cook to desired doneness, about 10 minutes for medium rare. (This took a little longer in my oven because my broiler doesn't like to stay on.) Let the meat rest for a few minutes while you gather your tortillas and pico de gallo. This is the time to grill or char some scallions if you like. Slice the meat against the grain, and serve!

Notes:

  • This pico de gallo recipe makes A LOT. I'm talking about a large mixing bowl full, so adjust the amount accordingly. If you are sharing with friends, it is perfect with tortilla chips.
In Recipes, Sunday Suppers Tags Main Dish
Comment

Easy Chocolate Mini Donuts

June 1, 2018 Allie
easy mini chocolate donuts

I might be turning into my father. I know it's more cliche for women to grow up and realize "Oh, I am my mother now." While I have a lot of those moments too, the receipts are pointing more towards my Dad, at least when it comes to donuts. 

I don't yet have a car full of hidden Dunkin' Donuts bags, but the evidence is there nonetheless. First, my obsession with Union Square Donuts, where I try to manipulate my way to every time I go to Boston. Just in the past month there was a pre-work trip to Blackbird Doughnuts, also in Boston, for both their vanilla cake doughnut and everything bagel doughnut (because I had to try that, it was excellent), then Claire and I made the most perfect heart-shaped doughnuts for our Royal Wedding viewing. And then, even before that trip I spent a Saturday morning very carefully frying a giant donut and calling it a cake (coming soon!) because I apparently love tempting fate with hot oil.  

Then there were these cuties!

If you didn't know, today is National Donut Day! I've never celebrated on the blog, and this year I'm fixing that. I wanted to keep it simple, just do a chocolate on chocolate situation, dressed up with a colorful coat of sprinkles. Classic and undeniable. 

But then, being me, I thought, hey, what if I made them vegan? Not for any reason really, other than somewhere along the way I decided that baked donuts are just cupcakes in another shape, and I wanted to have some fun with my favorite vegan cupcake recipe. Well, uh, *spoiler alert* these are NOT vegan donuts, because it turns out that my theory was not true, at least for cupcake batters that yield soft and tender cupcakes. While that makes for spectacular cupcakes, it does not make spectacular donuts, but rather easily destructible mini cakes that are impossible to remove from the pan. 

So I ate all those rejects out of the pan with a spoon, baked the remaining batter into cupcakes (poor me) and tried again with a different recipe. In the end, I just used Joy The Baker's recipe for chocolate baked donuts, because if you read her blog, then you know she's well-traveled on the donut path and I just followed. The glaze on the donuts is the glaze from the cupcakes, because I just can't let things go and also it is perfect for donuts.

These little guys are so happy looking with their sprinkle jackets, and each one is only one or two bites, so they are a perfect way to eat all the donuts you want to celebrate! 

chocolate mini donuts with sprinkles
filling mini donut pan.jpg
glazing and decorating mini chocolate donuts.jpg
three stages of donut decoration.jpg
chocolate mini donuts with sprinkles.jpg
easy mini chocolate doughnuts
sprinkle covered donuts

Baked Chocolate Mini Donuts

Donuts adapted from Joy the Baker, glaze from NYT. The donut recipe says it makes 18, I got far more than that.

For the donuts:

  • 1 cup all-purpose flour
  • 1/4 cup unsweetened cocoa powder
  • 1/2 teaspoon baking soda
  • 1/4 teaspoon salt
  • 1/2 packed cup light brown sugar
  • 1/2 cup buttermilk
  • 1 egg
  • 4 tablespoons unsalted butter, melted
  • 1 teaspoon vanilla extract

For the glaze: 

  • 1 cup powdered sugar
  • ΒΌ cup cocoa powder
  • 3 tablespoons rice milk
  • sprinkles for topping
  1. Make the donuts: heat oven to 325 degrees and spray a mini donut pan with cooking spray. In a mixing bowl, sift together flour, cocoa powder, baking soda and salt, and whisk in the brown sugar. In another bowl, whisk together remaining ingredients until well-combined. Pour the wet ingredients into the dry and whisk to combine, leaving no lumps.
  2. Either pipe or carefully spoon the batter into the pan, filling each mold about 2/3 full. Bake for 8-10 minutes until set and a toothpick inserted comes out clean. Let cool for a few minutes, then turn the donuts out onto a wire rack to cool completely. Repeat with remaining batter.
  3. When all donuts are baked and cooling, make the glaze: Sift together the powdered sugar and cocoa powder into a bowl, then whisk in the rice milk to form a glaze. In a separate small bowl, pour your sprinkles.
  4. When donuts are completely cool, you can glaze them. Dip the top of each donut into the glaze, about halfway down the sides. Turn over onto the wire rack set over a baking sheet to catch any drips. Let sit for about 30 seconds then dip into the sprinkles to completely coat. Let set then enjoy!
In Recipes Tags Dessert, Breakfast
Comment
← Newer Posts Older Posts →

For those who plan their next meal while eating the last.

Β 

INSTAGRAM

🎢When pizza’s on a bagel*, you can have pizza anytime**!🎢

*donut
** after you fry some donuts
FINALLY perfected these Burnt Honey Butter Biscuits & what good timing! It’s carb season & we are all hibernating! 🐻
Final thoughts on Small Thanksgiving: take your sweet potato + marshmallow combo firmly into dessert or even breakfast, and consider a cozy mashed potato soup with stuffing croutons to use up those leftovers. Stay safe & Happy Thanksgiving! πŸ˜·πŸ¦ƒ
Part 2 of Small Thanksgiving: all the stuff to stuff yourself with! An Italian sausage pasta-inspired stuffing and a vegetarian, spiced wild rice stuffed squash. Everything serves 4-6, gather safely this year! πŸ˜·πŸ¦ƒ #thanksgiving #smallthanksgiving #v
Now that we (and the world?) can let out that collective sigh of relief, I can  finally think about my favorite holiday! Everyone is probably (hopefully 😷)looking at smaller gatherings this year, so I’m sending some Small Thanksgiving ideas ou
So happy Disney keeps justifying my dumb baking purchases! This matcha shortbread is delicious, but make a good sandwich cookie it does not. I hid all the broken pieces πŸ™ˆ
Subscribe to Tea and Fog!

RECENT RECIPES

Featured
polenta with rosemary and goat cheese.jpeg
Salmon Wellington and Warm Rice Salad.jpeg
Pizza Donut Hero.jpeg
Burnt Honey Butter Biscuits.jpeg
Mashed Potato Soup with Stuffing croutons.jpeg
sweet potato donuts with marshmallow frosting.jpeg