• Home
    • Recipes
    • The Roast Chicken Project
    • Allie Dreams of Cake
    • Sunday Suppers
  • Travel
  • About
Menu

Tea and Fog

Street Address
City, State, Zip
Phone Number

Your Custom Text Here

Tea and Fog

  • Home
  • Recipes
    • Recipes
    • The Roast Chicken Project
    • Allie Dreams of Cake
    • Sunday Suppers
  • Travel
  • About

Grasshopper Layer Cake

June 30, 2020 Allie
Grasshopper cake

One of my favorite food memories of last year was the 70’s themed book club I hosted for my friends in December. I didn’t anticipate that by the time I got around to sharing that story, the idea of filling my apartment with 15 friends would be as retro as some of the items on the menu, but 2020 has warped things beyond all recognition.

I do hope to one day enjoy hanging out with my friends again in a socially acceptable way, but some of the food items I prepared for this particular party, maybe I don’t need to enjoy again? I mean, pigs in blankets and BBQ meatballs are still classics for a reason, but I can see why pineapple cheese balls aren’t still trending.

And, let me just tell you now that no, you do not need to, nor should you ever try, to recreate the sandwich loaf, a monstrosity you’ll find in various 70’s Cocktail Party listicles. No one will eat it and all you will have for your efforts is layers of egg salad and white bread in a shame corner in your fridge.

Do you hear me? DON’T TRY IT.

One good thing that came out of this culinary experiment was a reminder that grasshopper brownies are pretty excellent! We used to make them when Claire and I were kids, and I always felt so daring when we’d bring down the bottle of creme de menthe stashed above the fridge. We were baking with alcohol! Never mind that you won’t use enough of the stuff to endanger anyone of any age, and the liqueur is really there more to add the signature green color.

The brownies were, predictably, a hit at the party. My friend Susan kept telling me how much she loved them even weeks later, so I of course started wondering if I could turn them into a cake somehow for her February birthday. But we went to Florida, and then we all know where the end of February took us, so the cake never happened.

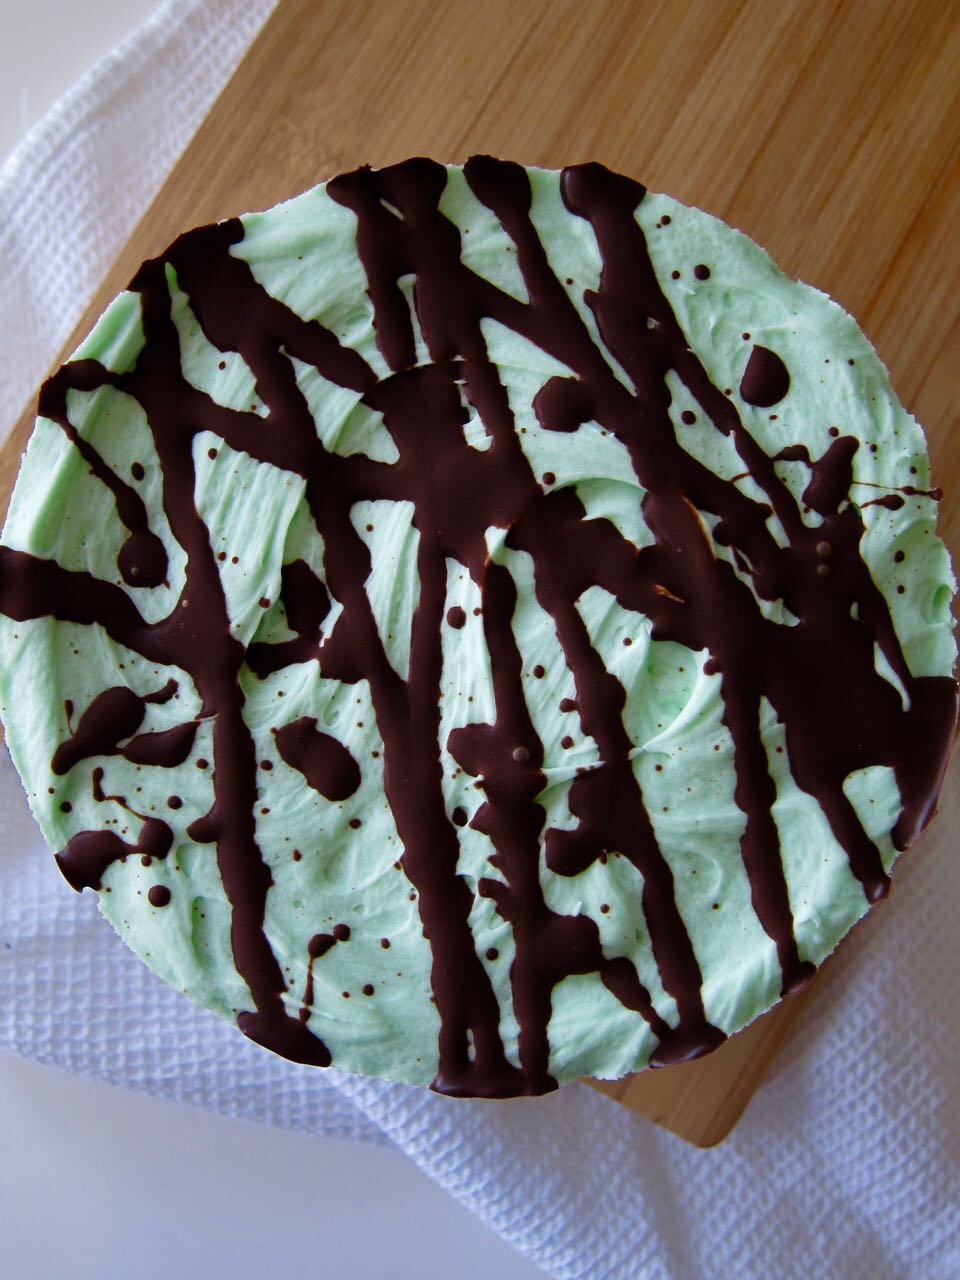
But I am really terrible at dropping things. I kept thinking about the grasshopper cake, and finally, because I had all this time and most of a bottle of creme de menthe still sitting on my bar, I just went ahead and made it. And I’m so pleased with how it turned out! I went for the Milk Bar approach with assembly, to highlight what I think is the spirit of the grasshopper brownie: the layers of ganache, mint filling and chocolate brownie all on display. Besides, this cake is rich anyway, so there’s absolutely no need for frosting the outside.

I also tried out the Milk Bar chocolate cake recipe in this too, which turned out to be the perfect choice for two reasons: the cake isn’t very rich or super chocolatey, so is actually the perfect counterpart to the extremely rich buttercream filling, and to make the chocolate cake, you have to first make chocolate fudge. This gives you enough left over to dollop inside the cake, adding an extra hit of fudgey chocolate, to call to mind the brownie inspiration of this cake. The buttercream filling is the best version of the grasshopper layer I’ve come across. It’s sweet and rich but not teeth curling the way some older recipes can be. I topped all those layers off with a splatter of homemade magic shell, and voila, this cake is ready to party like it’s 1975!

I think it would be a great, easy bake for the upcoming holiday, if you are taking a break from the red food dye this year.

grasshopper layer cake
decorating grasshopper cake
sliced grasshopper cake

Grasshopper Cake

Cake layers adapted from Milk Bar, grasshopper filling from the New York Times. Yes, the milk bar recipes call for glucose, but that is found easily online or you can sub corn syrup if you need to.

Serves 8

For the fudge sauce:

  • 1 oz quality dark chocolate, chopped

  • 2 tbs cocoa powder

  • 1/8 tsp kosher salt

  • 1/4 cup glucose (or 2 tbs corn syrup)

  • 2 tbs sugar

  • 1/4 cup heavy cream

For the chocolate cake:

  • 1 1/4 cups all purpose flour (or cake flour, I used what I had on hand)

  • 1/2 cup cocoa powder

  • 1 1/2 tsp baking powder

  • 1 1/2 tsp kosher salt

  • 1 stick unsalted butter, softened

  • 1 1/2 cups sugar

  • 3 eggs

  • 1/2 cup buttermilk

  • 1/4 cup neutral oil, such as canola or grapeseed

  • 1 tsp vanilla

  • 3 tbs fudge sauce

For the buttercream:

  • 1 stick unsalted butter, softened

  • 2 tbs cream cheese, softened

  • 2 tbs creme de menthe

  • 1/2 tsp peppermint extract

  • pinch of kosher salt

  • 2 cups powdered sugar

For assembly and decorating:

  • 1/4 cup milk

  • 1/2 tsp peppermint extract

  • 6 inch cake ring

  • acetate or parchment paper

  • 1/4 cup dark chocolate, chopped

  • 1 tsp coconut oil

  1. Make the fudge sauce: Combine the chocolate, cocoa and salt and in a bowl and set aside. In a small sauce pan, combine the glucose, sugar and heavy cream and bring to a boil, stirring occasionally. Once it boils, pour over the chocolate and cocoa let sit for a full minute. After one minute, slowly start to whisk everything together, gradually increasing your speed, until you have a glossy, smooth fudge sauce. This should take a few minutes, depending on how fast and vigorously you whisk. Set aside or refrigerate if you are making ahead. You will want to bring it up to room temperature before using to make the cake.

  2. Make the cake: Heat oven to 350 degrees, spray a quarter sheet pan with cooking spray and line with parchment. Set aside. In a bowl, combine the flour, cocoa, baking powder and salt and whisk to combine. Set aside. In the bowl of a stand mixer, add the butter and sugar and beat together for 3 minutes on medium-high speed with the paddle attachment. You’ll want to make sure the butter is completely softened for this. Add in the eggs, and mix again on medium-high for 3 minutes, and scrape down the sides of the bowl with a spatula.

  3. Turn the mixer on low speed and add in the buttermilk, oil, and vanilla. Increase speed to medium high and beat for another 3-5 minutes, until everything has doubled in volume and the mixture is completely combined, with no visible streaks. Add the fudge sauce and mix on low until combined. Add the dry ingredients and mix on low for about a minute, just until everything comes together. Scrape down the bowl and mix on low again to finish combining.

  4. Spread the batter in the prepared pan and bake 30-35 minutes, until puffed and the top of the cake bounces back when gently pressed with a finger. Cool completely before assembling the cake.

  5. Make the buttercream: beat the butter and cream cheese together, using either a stand mixer with the paddle attachment or hand mixer. Once smooth, add the creme de menthe, peppermint extract and salt and mix again until smooth. On low speed, slowly add the powdered sugar. Once all the powdered sugar has been added to the bowl, increase the speed and beat until smooth and fluffy. You should have a light, spreadable mixture. Taste, and adjust with more peppermint extract if you like it more minty.

  6. Assemble the cake: In a small bowl, combine the milk and the peppermint extract. Using the cake ring, cut 2 full 6-inch rounds out of the cooled cake, one at the top left corner and one at the bottom right corner. Cut 2 half circles out of the remaining cake, and clean the cake ring. Line the sides of the cake ring with acetate or parchment paper. Place those half circles in the lined cake ring and fill in the middle gap with as some of the remaining cake scraps. Press it together to form the bottom layer and using a spoon or pastry brush, evenly douse with 1/3 of the milk mixture. Top with 1/3 of the buttercream and spread into an even layer, then dollop with fudge sauce. Top with a second layer of the cake and line with another circle of acetate or parchment. Douse this layer with 1/3 of the milk mixture, spread with 1/3 of the buttercream, and dollop with fudge sauce. Top with your third and final cake layer, douse with remaining milk mixture and spread remaining buttercream on top. Place cake in the freezer to chill until firm, overnight if you can.

  7. Once cake is chilled, to decorate the top, you can use any remaining warmed fudge sauce or do as I did, and melt together some chocolate and coconut oil and splatter over the top. The magic shell will harden on the chilled cake, and I like the texture contrast this extra type of chocolate adds to the top.

  8. To serve, slide the metal ring off the cake and remove the acetate or parchment. Let warm up a bit and slice and serve!

In Recipes, Allie Dreams of Cake Tags Dessert
Comment

Banana Blueberry Scones - Your Break From Banana Bread

June 26, 2020 Allie
Banana Blueberry Scones

Which 2020 Baking Club did you join?

Have you been lovingly cultivating a sourdough starter with a punny name? Are you growing a miniature garden in water glasses with the ends of your vegetables? How many loaves of banana bread have you made this year?

After killing a sourdough starter a few years ago and having to discard its moldy, alcoholic corpse, I knew not to go down that path. I set up a scallion garden on my living room window sill, until the day I decided to use my new dust buster and found their brittle husks and dried out brown roots, forlorn and abandoned behind the curtains. My one successful bandwagon bake was all the way back in the first week of San Francisco’s lockdown, when I braved the hordes at Safeway for a packet of vanilla pudding mix and a bag of chocolate chips, to make Chrissy Teigen’s famous banana bread.

Maybe because my banana bread was swept up in a vortex of carb loading that first week, I had almost forgotten about this particular genre of quarantine baking until Claire told me the other day she had leftover bananas but couldn’t bring herself to make another banana bread. I hadn’t really thought about banana bread since the two loaves I made in March, but then, I don’t regularly buy bananas. I’m not looking for ways to use them up most of the time.

If you do have this problem, but you are over banana bread, what do you do with your bananas? How many bananas do you have left? How ripe are your bananas? How many times can I type the word bananas?

There are options. You can freeze bananas and add to smoothies, of course. My friend Ginny recently made classic banana pudding, with vanilla pudding from the box and nilla wafers, which was a great reminder of what I should have done with my box of pudding (I have no idea what it added to the banana bread, actually). You could also turn that into a cake, too, if you want a project.

But Claire’s comment also reminded me that I’ve been sitting on a recipe for banana blueberry scones! I first started testing out this recipe last November, and I finally felt like I’d cracked it, but then travel and holidays happened, and I felt like I should wait to share it in blueberry season. And now we’re here, and I had completely forgotten about these!

It’s been long enough since I first tested this recipe that I wasn’t even sure if I’d found my final notes, so of course I had to test these out again. I’m happy to report they are as excellent as I hoped, and live up to the scones I’ve been imagining since 2009, when I first tasted the banana/blueberry combo at Alice’s Tea Cup in New York.

I have no idea when I’ll get back to New York or to Alice’s for another scone and a pot of my favorite Sessa tea, but for now, these will hold me over. And if you, like Claire, are looking for banana bakes, might I suggest these scones?

banana blueberry scone
Banana Blueberry Scone Dough.jpg
Banana Blueberry Scones close up.jpg
baked blueberry banana scones

Banana Blueberry Scones

Makes 6 scones

  • 2 1/4 cups flour plus more, for counter

  • 1/4 cup sugar

  • 1/2 tbs baking powder

  • 1/2 tsp baking soda

  • 3/4 tsp kosher salt

  • 1 stick unsalted butter, cold

  • 1/2 cup yogurt + 1/4 cup water (or 3/4 cup buttermilk)

  • 1 very ripe banana, lightly mashed

  • zest of one small lemon

  • 1/2 cup blueberries, frozen

  • turbinado sugar, for garnish

  1. Heat oven to 400 degrees. In the bowl of a stand mixer, whisk together the flour, baking powder, baking soda, sugar and salt, then cut the butter into small cubes and scatter into the dry mixture. Using the paddle attachment on low speed, work the butter into the mixture until you have small pieces about the size of peas.

  2. In a measuring cup, whisk together the yogurt and water until smooth (or if using buttermilk, just add to the bowl), then add to the bowl with the banana and the lemon zest, if using. Stir until everything starts to come together, working the banana throughout (some chunks of banana left are ok).

  3. Add the frozen blueberries and gently mix in, trying not to break them up too much (though a little purple is ok!). Turn the dough out onto a floured counter and shape into a round at least 1 1/2 inches thick. Cut the round into 6 wedges, transfer the wedges to a parchment lined baking sheet. Sprinkle with the sugar, and bake for 25 minutes until browned and golden.

In Recipes Tags Breakfast
2 Comments

Lemon Meringue Pie Ice Cream - Stand Mixer Method

June 23, 2020 Allie
Lemon Meringue Pie Ice Cream

As I mentioned in my last post, I’ve been combating boredom by turning myself into a one-woman bakery for my friends and their coworkers. It feels great to bake for others right now (and always) but that also doesn’t mean I’m not holding something back for myself. Baker’s prerogative, you know.

True, this ice cream would never survive a half hour walk out of the freezer, but that’s only the excuse for why I couldn’t share it with others. “Oh, that? No, it can’t travel, sorry!”

I’m not sorry.

I’m not sorry, because this lemon meringue pie ice cream is one of my favorite things I’ve ever made! I love lemon meringue pie and this tastes exactly like it, if you could order a slice extra chilled. It’s got all the components: sharp lemon curd, crispy pie crust, and pillowy meringue, all suspended in a mildly lemony ice cream base that’s slow-churned into airy, creamy perfection.

Let’s talk about the churn for a minute, because it’s what really made this ice cream, for me. After two attempts at churning up the ice cream base with my ice cream maker, I had to admit that my little countertop churn has died, and after 20 minutes spinning in the machine, I just had soup. What to do?

I remembered an episode of America’s Test Kitchen I caught forever ago, where the chef churned up a creamy ice cream, not by employing the cheat with condensed milk and whipped cream, but with regular ice cream ingredients and using just a stand mixer (or a mixer or blender of some sort). I couldn’t clearly remember the actual method, and the recipe is buried behind the pay wall, and I never renewed my subscription, so... I just kind of used my best judgement. Four hours later I had actual ice cream! The trick is just to freeze the ice cream for a bit, break up the ice chunks, freeze again, and repeat, until you end up with a smooth, creamy, frozen consistency. It’s a half-day commitment, true, but what I actually ended up with was so airy and perfect I could not believe it.

So if you’ve been holding off on making your own ice cream because you don’t want to buy specialty equipment, you don’t need it! Go forth and turn pie into ice cream!

scoop of lemon meringue pie ice cream
Scooping Lemon Meringue Pie Ice Cream.jpg
scooping lemon meringue ice cream.jpg
scooping lemon meringue pie ice cream

Lemon Meringue Pie Ice Cream - Stand Mixer Method!

Makes 1 quart ice cream.

For the ice cream base:

  • 2 cups heavy cream

  • 1 cup whole milk

  • 1/2 cup sugar

  • 1 vanilla bean, split lengthwise

  • 10 oz lemon curd, divided

For the pie crust pieces (adapted from David Lebovitz):

  • 1 oz unsalted butter

  • 1 tsp vegetable oil

  • 1 tbs water

  • 1 tsp sugar

  • pinch salt

  • 1/3 cup flour

For the meringue:

  • 2 egg whites

  • 3 oz sugar

  • pinch kosher salt

  • pinch cream of tartar

  1. Make the ice cream base. Add 1 cup of heavy cream into a medium pot and add the sugar and the salt. Scrape the vanilla bean seeds into the mixture and add the pod. Warm over medium heat until the sugar is completely dissolved. Remove from the heat, add the remaining 1 cup cream and the milk and whisk in 1/2 cup of the lemon curd until fully combined.

  2. Chill ice cream base completely in the fridge. While ice cream base is chilling, make the mix ins: Heat oven to 400 degrees. In an oven-safe bowl, add the butter, oil, water, sugar and salt and put the bowl in the oven until the mixture is bubbling and browned around the edges (check around 8 minutes). Carefully remove bowl from the oven and add the flour and stir to combine (carefully, it may spatter). Transfer the dough to a parchment lined baking sheet and spread thinly. Bake 10-12 minutes, until golden brown and crisp. Let cool completely, then break into pieces and set aside.

  3. Make the meringue: Add all ingredients to the bowl of a stand mixer over simmering water. Whisking constantly, heat the mixture until it reaches 165 degrees (you can use a thermometer, or at minimum, check the temperature with a finger. When it feels too hot to touch, you are done). Transfer the bowl to the mixer fitted with the whisk attachment, then beat on high until glossy and completely cool, about 5 minutes. Set aside until ready to use.

  4. When ready to churn, pour the chilled ice cream base into the bowl of a stand mixer (or regular mixing bowl if using a hand mixer). Freeze for 45 minutes, then, mix with the whisk attachment, breaking up the frozen pieces and fully incorporating into the mixture. Place the bowl back in the freezer, and freeze another 30-45 minutes, and whisk again. Repeat this process until you have a frozen mixture the consistency of soft serve. This should take about 4 hours, depending.

  5. Layer the ice cream and with the pie crust, meringue, and remaining lemon curd in a freezer safe container and freeze until firm. Serve and enjoy!

Notes:

  • For a flavor even more reminiscent of a lemon meringue pie, try toasting some or all of your meringue before layering into the ice cream. Heat oven to 375, spread the meringue thickly on a parchment lined baking sheet, and use the back of a spoon to create swoops and peaks. Bake until browned and puffed, about 15 minutes. Let cool completely before tearing into pieces and adding to the ice cream.

In Recipes Tags Dessert
1 Comment
← Newer Posts Older Posts →

For those who plan their next meal while eating the last.


INSTAGRAM

🎶When pizza’s on a bagel*, you can have pizza anytime**!🎶

*donut
** after you fry some donuts
FINALLY perfected these Burnt Honey Butter Biscuits & what good timing! It’s carb season & we are all hibernating! 🐻
Final thoughts on Small Thanksgiving: take your sweet potato + marshmallow combo firmly into dessert or even breakfast, and consider a cozy mashed potato soup with stuffing croutons to use up those leftovers. Stay safe & Happy Thanksgiving! 😷🦃
Part 2 of Small Thanksgiving: all the stuff to stuff yourself with! An Italian sausage pasta-inspired stuffing and a vegetarian, spiced wild rice stuffed squash. Everything serves 4-6, gather safely this year! 😷🦃 #thanksgiving #smallthanksgiving #v
Now that we (and the world?) can let out that collective sigh of relief, I can  finally think about my favorite holiday! Everyone is probably (hopefully 😷)looking at smaller gatherings this year, so I’m sending some Small Thanksgiving ideas ou
So happy Disney keeps justifying my dumb baking purchases! This matcha shortbread is delicious, but make a good sandwich cookie it does not. I hid all the broken pieces 🙈
Subscribe to Tea and Fog!

RECENT RECIPES

Featured
polenta with rosemary and goat cheese.jpeg
Salmon Wellington and Warm Rice Salad.jpeg
Pizza Donut Hero.jpeg
Burnt Honey Butter Biscuits.jpeg
Mashed Potato Soup with Stuffing croutons.jpeg
sweet potato donuts with marshmallow frosting.jpeg